> ## Documentation Index
> Fetch the complete documentation index at: https://docs.kinemation.xyz/llms.txt
> Use this file to discover all available pages before exploring further.
# 🗒️FPS Setup
> This page explains on how to set up the FPS add-on.
**Tip:** If you’re new to CAS, use the **KINEMATION/Shared/Character** humanoid model.
## Character
Add your character to the scene, right-click on it and select "KINEMATION/Setup CAS":
 Select the **FPS** preset:
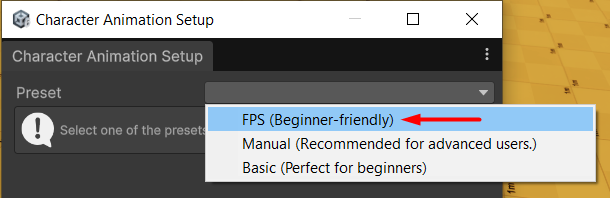 **Note**: It will only show up if the demo content is installed.
Then, follow the setup steps:
**Note**: It will only show up if the demo content is installed.
Then, follow the setup steps:
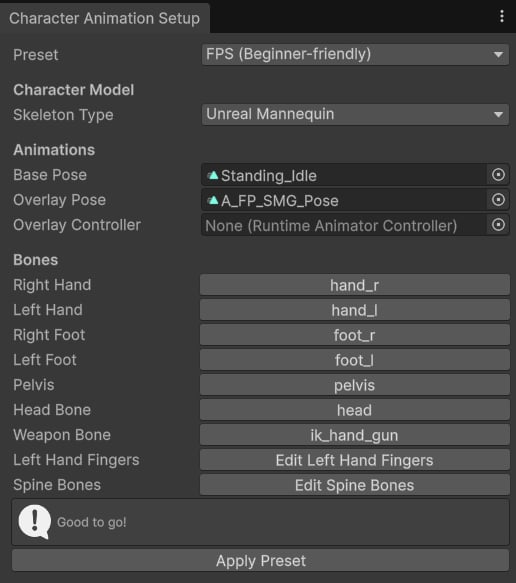 #### 1. Skeleton Type
Select the type of your character model skeleton:
#### 1. Skeleton Type
Select the type of your character model skeleton:
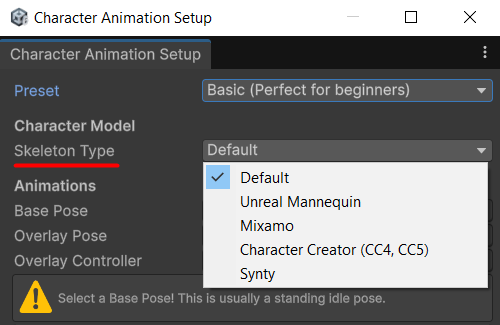 CAS supports most popular model types:
* Unreal Mannequin (UE4\&UE5).
* Mixamo
* Character Creator (CC4, CC5)
* Synty
For other models, pick the "Default" option - CAS will try to find bones recursively.
#### 2. Animations
Next, we need to pick Animation Clips for our character:
CAS supports most popular model types:
* Unreal Mannequin (UE4\&UE5).
* Mixamo
* Character Creator (CC4, CC5)
* Synty
For other models, pick the "Default" option - CAS will try to find bones recursively.
#### 2. Animations
Next, we need to pick Animation Clips for our character:
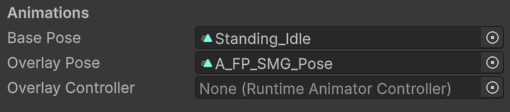 **Base Pose** is your character standing idle animation. CAS uses it to compute additive motion in runtime.
**Overlay Pose** is your weapon idle animation. **Overlay Controller** reference can be left empty, we will add it in the next pages.
#### 3. Bones
Finally, we need to assign bone references, so CAS can create Procedural Animation Modifiers:
**Base Pose** is your character standing idle animation. CAS uses it to compute additive motion in runtime.
**Overlay Pose** is your weapon idle animation. **Overlay Controller** reference can be left empty, we will add it in the next pages.
#### 3. Bones
Finally, we need to assign bone references, so CAS can create Procedural Animation Modifiers:
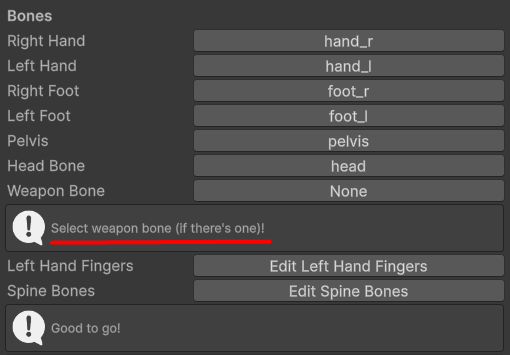 By default, this window will prompt you to select a Weapon Bone - a special bone in the character skeleton that contains weapon movement. If your model doesn't have such a bone, you can skip this step and apply the preset.
Once all bones are assigned, you can press the "Apply Preset" button.
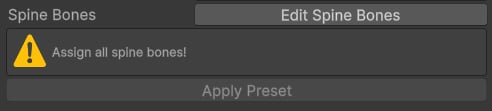
If something is missing, you will see a warning what bones should be assigned manually:
By default, this window will prompt you to select a Weapon Bone - a special bone in the character skeleton that contains weapon movement. If your model doesn't have such a bone, you can skip this step and apply the preset.
Once all bones are assigned, you can press the "Apply Preset" button.
If something is missing, you will see a warning what bones should be assigned manually:
 #### 4. Assign Animator
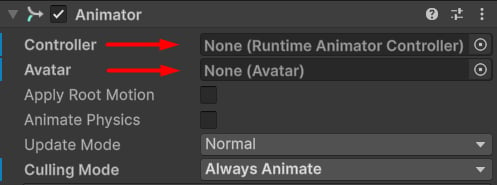
If your character is **Generic**, you will need to assign an Animator Controller:
#### 4. Assign Animator
If your character is **Generic**, you will need to assign an Animator Controller:
 **Tip**: Ensure that the selected animations and Animator are compatible with your skeleton! Generics will only work with Generic animations, and Humanoids - with Humanoid clips.