> ## Documentation Index
> Fetch the complete documentation index at: https://docs.kinemation.xyz/llms.txt
> Use this file to discover all available pages before exploring further.
# How to swap weapon mesh
> In this tutorial you will learn how to replace gun meshes in this pack.
**Note**: [Blender](https://www.blender.org/) software is required for this tutorial.
Replacing weapon models from the **FPS Animation Pack** requires rigging a custom weapon to one of the skeletons in the pack. As an example, we will use the AKX model.
## Export weapon mesh from Unreal Engine
First, open up the contents of the **FPS Animation Pack** (if you can't see this directory, please visit this page:
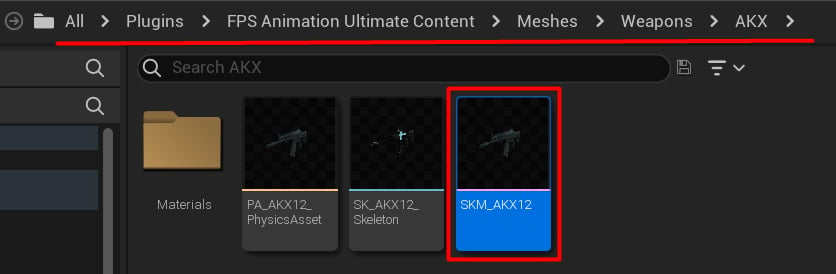
Next, locate the weapon mesh you want to replace:
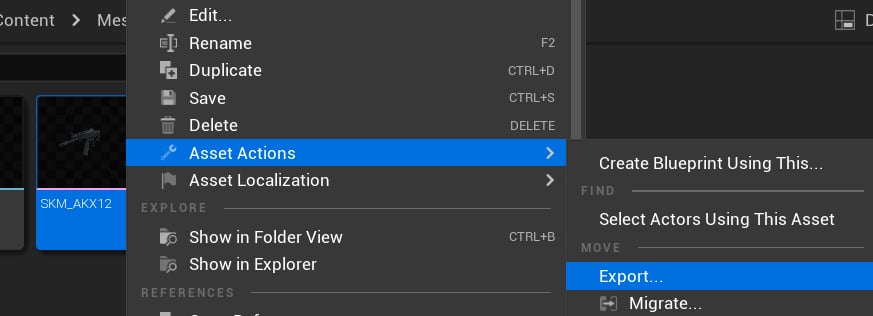
 Right-click on it and select the exporting option:
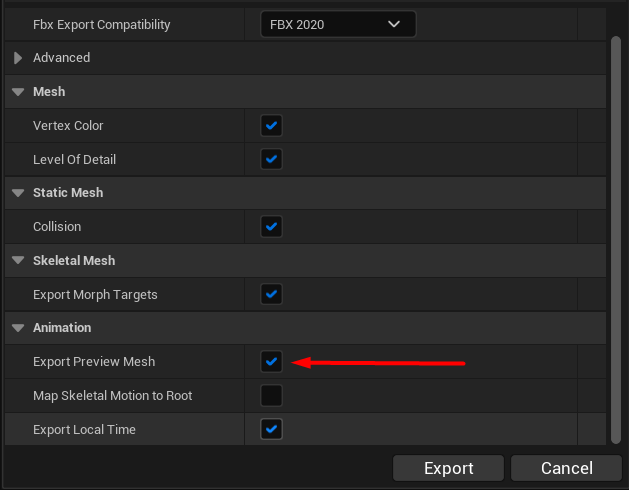
 Select the "Export Preview Mesh" option and export the model from Unreal Engine:
 Now, it's time to do the rigging. We will use Blender in this example, but you can use any other 3D software.
## Import weapons into Blender
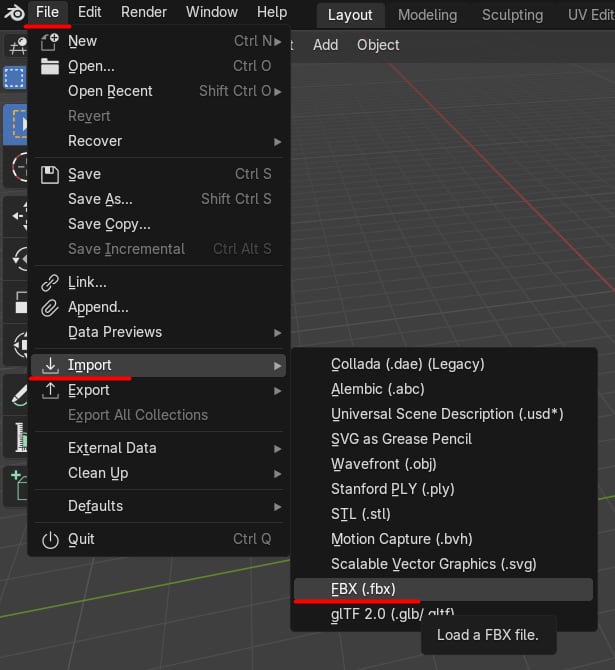
Open Blender (or a software of your choice) and import both models as FBX:
Now, it's time to do the rigging. We will use Blender in this example, but you can use any other 3D software.
## Import weapons into Blender
Open Blender (or a software of your choice) and import both models as FBX:
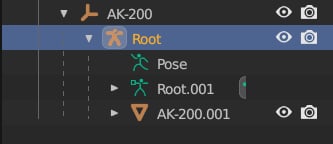
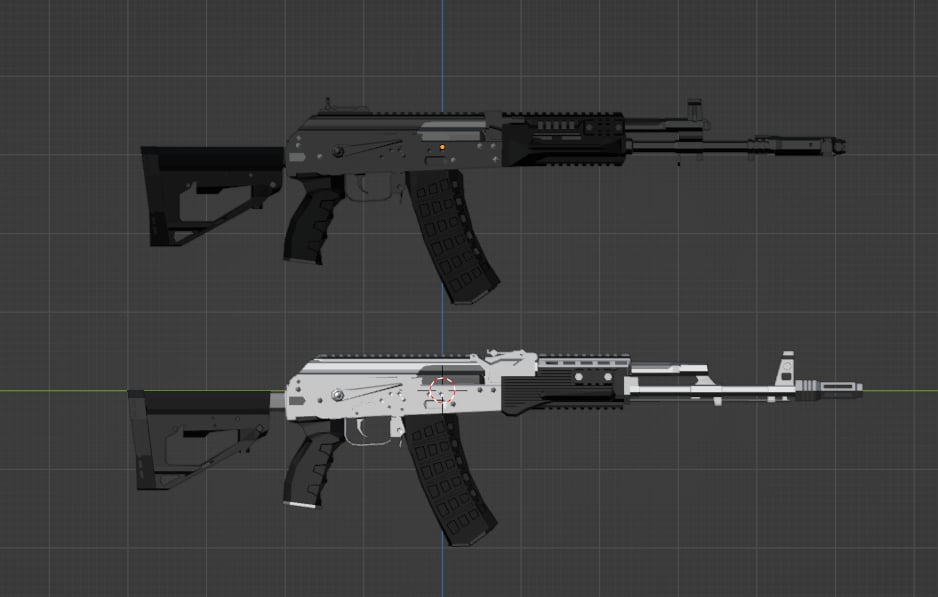 If your model already has a skeleton, make sure to remove it:
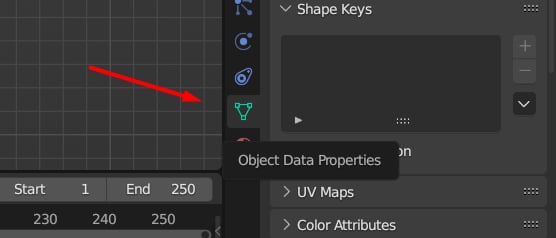
 Next, we need to create vertex groups for our custom weapon. To do this, right-click on the model and press Tab to activate the "**Edit**" mode. Select the "**Object Data Properties**" icon:
 Now you add new elements to the "**Vertex Groups**" list on the right:
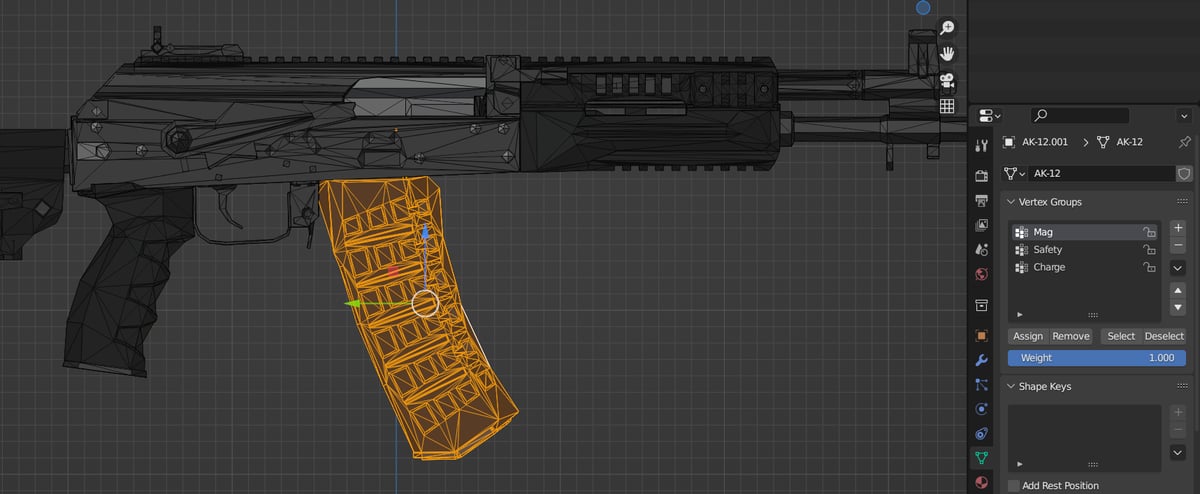 To create a new group, right-click on the "**+**" icon and set its name to the target bone. Make sure to create vertex groups for each bone in the skeleton.
Now, we need to assign parts of the weapon to our newly created groups. Here is how to do it step-by-step:
1. Left-click on the vertex group.
2. Select the part of the weapon you want to include (hover over the part and press L).
3. Click the "Assign" button.
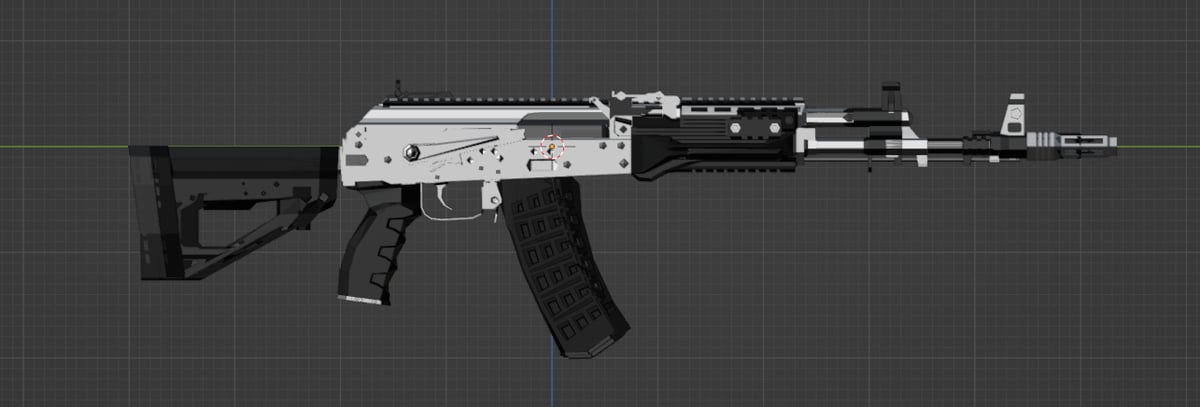
Once all groups are assigned, we need to parent our custom model to the target skeleton. To do this, make sure to align weapons perfectly:
To create a new group, right-click on the "**+**" icon and set its name to the target bone. Make sure to create vertex groups for each bone in the skeleton.
Now, we need to assign parts of the weapon to our newly created groups. Here is how to do it step-by-step:
1. Left-click on the vertex group.
2. Select the part of the weapon you want to include (hover over the part and press L).
3. Click the "Assign" button.
Once all groups are assigned, we need to parent our custom model to the target skeleton. To do this, make sure to align weapons perfectly:
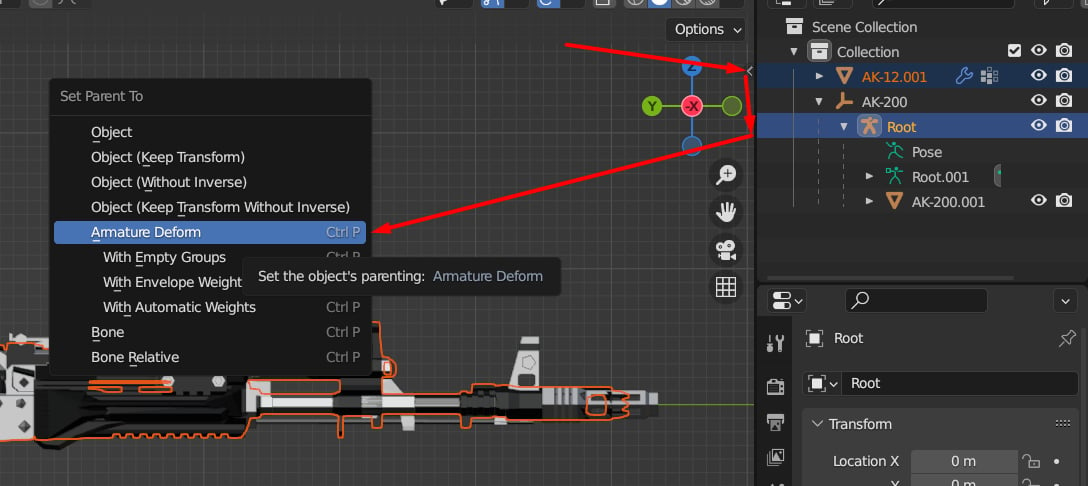
 Next, select your custom weapon model, then the target skeleton, and press **Ctrl + P**, select the "**Armature Deform**" option:
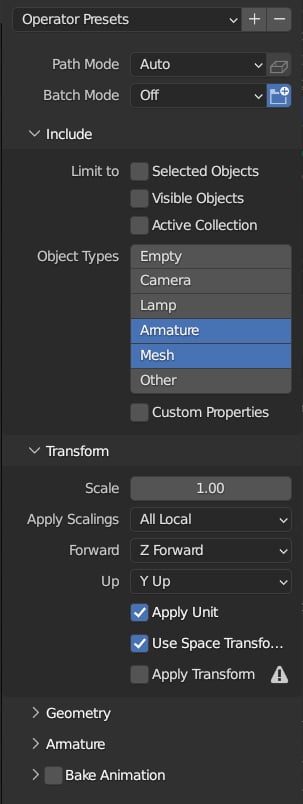
 Now, we can export our custom model as **FBX**. To do this, go to **File → Export → FBX:**
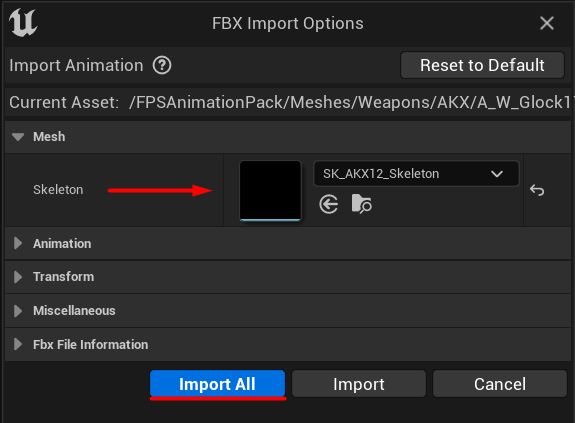
 Finally, we need to import our model to Unreal Engine. Click the "Import" button in the Unreal Editor, select the weapon FBX model, select the original skeleton, and click import:
 Now, you are custom weapon model should work with animations from the pack! If something went wrong along the way, do not hesitate to reach out on our [Discord](https://discord.gg/kinemation-1027338787958816860).