> ## Documentation Index
> Fetch the complete documentation index at: https://docs.kinemation.xyz/llms.txt
> Use this file to discover all available pages before exploring further.
# 📚Setup
> In this section we will learn how to set up Magic Blending.
## Add Animator Component
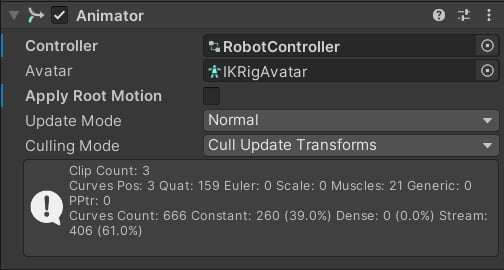
First, add your character to the scene and add the **Animator** component. Make sure to assign the **Animator Controller** as well:
 ## Create Rig Asset
Open up your character hierarchy and find the root bone (it can also be called "Armature", "Hips", etc.):
## Create Rig Asset
Open up your character hierarchy and find the root bone (it can also be called "Armature", "Hips", etc.):
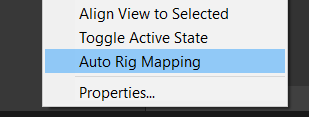
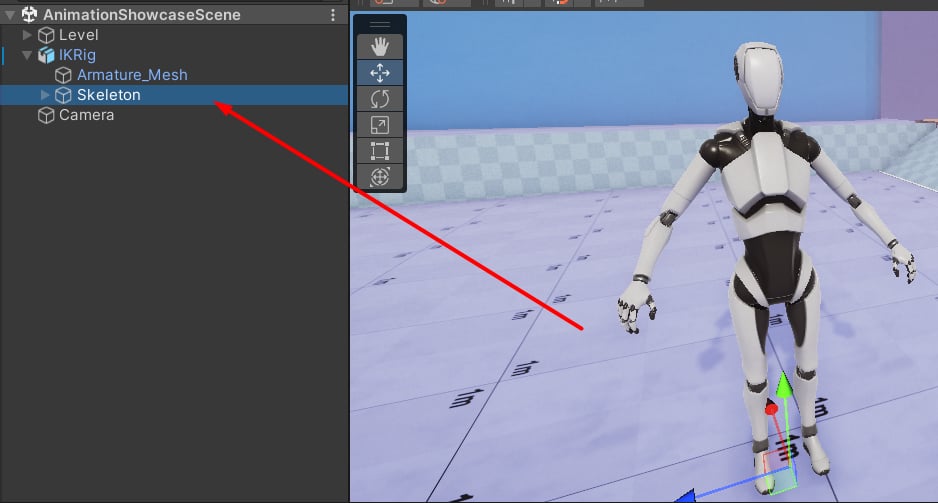 Next, right-click on the root bone and select **Auto Rig Mapping**:
 After this, a **Rig Asset** will be generated in the active folder:
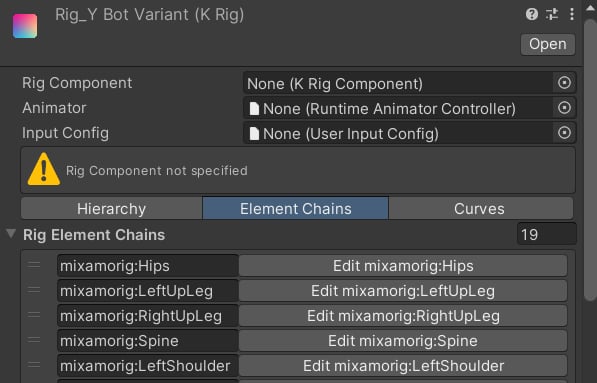 **Note**: the Rig Asset stores information about the character's hierarchy as a Scriptable Object.
## Create Magic Blend Asset
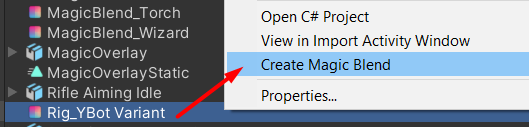
Right-click on your **Rig Asset** and select **Create Magic Blend**:
**Note**: the Rig Asset stores information about the character's hierarchy as a Scriptable Object.
## Create Magic Blend Asset
Right-click on your **Rig Asset** and select **Create Magic Blend**:
 Now, a **Magic Blend Asset** has been generated in the active folder:
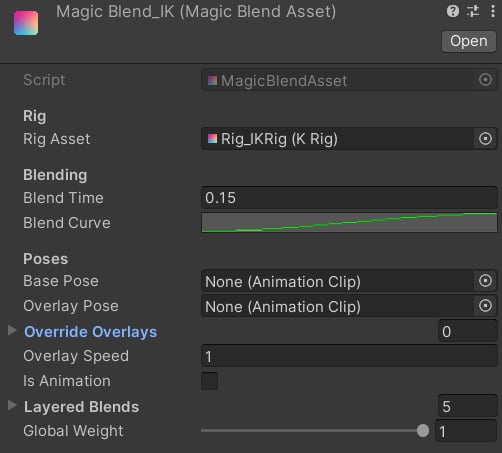 Let's break down each property:
* **Rig Asset** - target skeleton asset, keep it as is.
* **Blend Time** - blend in time in seconds.
* **Blend Curve** - blend in curve. It will be used to blend in the *Magic Blend Asset* when it becomes active.
* **Base Pose** - the idle stance pose. It will be "subtracted" from the *Animator* output to generate additive animation.
* **Overlay Pose** - custom weapon or item pose. It will be animated in runtime.
* **Override Overlays** - use these overrides to add custom animations to your overlay pose.
* **Overlay Speed** - play rate of the overlay animation.
* **Is Animation** - set this to true to play the clip as an animation.
* **Layered Blends** - settings for each bone chain with weights. Use it to adjust the blending. By default, the plugin will generate these bone chains:
* Lower Body
* Spine
* Head
* Arms
* Fingers
* **Global Weight** - controls the global influence of the blending: 0 is disabled and 1 is fully active.
## Assign Poses
Pick the idle and overlay poses you like and assign them in the **Magic Blend Asset**:
Let's break down each property:
* **Rig Asset** - target skeleton asset, keep it as is.
* **Blend Time** - blend in time in seconds.
* **Blend Curve** - blend in curve. It will be used to blend in the *Magic Blend Asset* when it becomes active.
* **Base Pose** - the idle stance pose. It will be "subtracted" from the *Animator* output to generate additive animation.
* **Overlay Pose** - custom weapon or item pose. It will be animated in runtime.
* **Override Overlays** - use these overrides to add custom animations to your overlay pose.
* **Overlay Speed** - play rate of the overlay animation.
* **Is Animation** - set this to true to play the clip as an animation.
* **Layered Blends** - settings for each bone chain with weights. Use it to adjust the blending. By default, the plugin will generate these bone chains:
* Lower Body
* Spine
* Head
* Arms
* Fingers
* **Global Weight** - controls the global influence of the blending: 0 is disabled and 1 is fully active.
## Assign Poses
Pick the idle and overlay poses you like and assign them in the **Magic Blend Asset**:
 In this example, we will choose standing idle and wizard poses. Additionally, if you want to combine multiple overlays, add overrides:
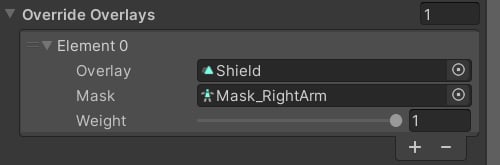 You can add as many overrides as you want, make sure to specify the **Animation Clip** and the **Avatar Mask** (it will tell the system what bones to override for the Overlay).
If your overlay is an animation (e.g. shooting or attacking), specify the **Overlay Speed** and check **Is Animation**:
You can add as many overrides as you want, make sure to specify the **Animation Clip** and the **Avatar Mask** (it will tell the system what bones to override for the Overlay).
If your overlay is an animation (e.g. shooting or attacking), specify the **Overlay Speed** and check **Is Animation**:
 ## Adjust Layered Blending
Open up the **Layered Blends** list and adjust the bone chains:
## Adjust Layered Blending
Open up the **Layered Blends** list and adjust the bone chains:
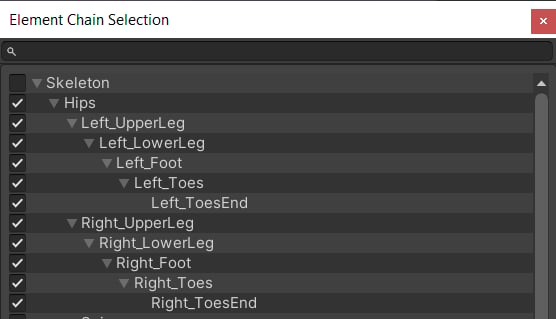 **Note**: it works similarly to the *Avatar Masks*. Select the bones you need and toggle the check box to confirm selection.
In the next section, we will explain how to adjust the blending values to achieve the desired result.
## Add Magic Blending
Navigate to your character prefab and add a **Magic Blending** component. Ensure you add it to the same Game Object that the Animator is attached to:
**Note**: it works similarly to the *Avatar Masks*. Select the bones you need and toggle the check box to confirm selection.
In the next section, we will explain how to adjust the blending values to achieve the desired result.
## Add Magic Blending
Navigate to your character prefab and add a **Magic Blending** component. Ensure you add it to the same Game Object that the Animator is attached to:
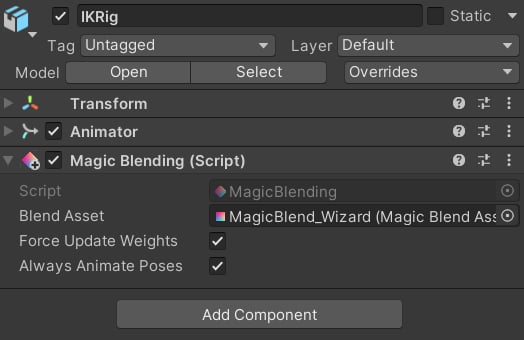 **Tip**: you can drag and drop the Magic Blend Asset on the character prefab, and the component will be added automatically!
All you have to do is assign the **Magic Blend Asset** in this component. Now you can start the game and play around with the values in the **Magic Blend Asset**!
**Tip**: you can drag and drop the Magic Blend Asset on the character prefab, and the component will be added automatically!
All you have to do is assign the **Magic Blend Asset** in this component. Now you can start the game and play around with the values in the **Magic Blend Asset**!