> ## Documentation Index
> Fetch the complete documentation index at: https://docs.kinemation.xyz/llms.txt
> Use this file to discover all available pages before exploring further.
# 🦾Setup
> In this tutorial you will learn how to set up the plugin.
**Retarget Pro** offers a very easy setup process.
First, select the source character — this is the model to retarget animations FROM. Next, select the target model — this is the skeleton to retarget TO.
Right-click and select **"Create Retarget Profile"**:
 **Note:** *Retarget Profile* is a data asset that contains retargeting settings for your character models. It will be saved to the current folder.
After that, a **Retarget Pro Window** will open up containing previews of selected characters and retargeting settings.
**Note:** *Retarget Profile* is a data asset that contains retargeting settings for your character models. It will be saved to the current folder.
After that, a **Retarget Pro Window** will open up containing previews of selected characters and retargeting settings.
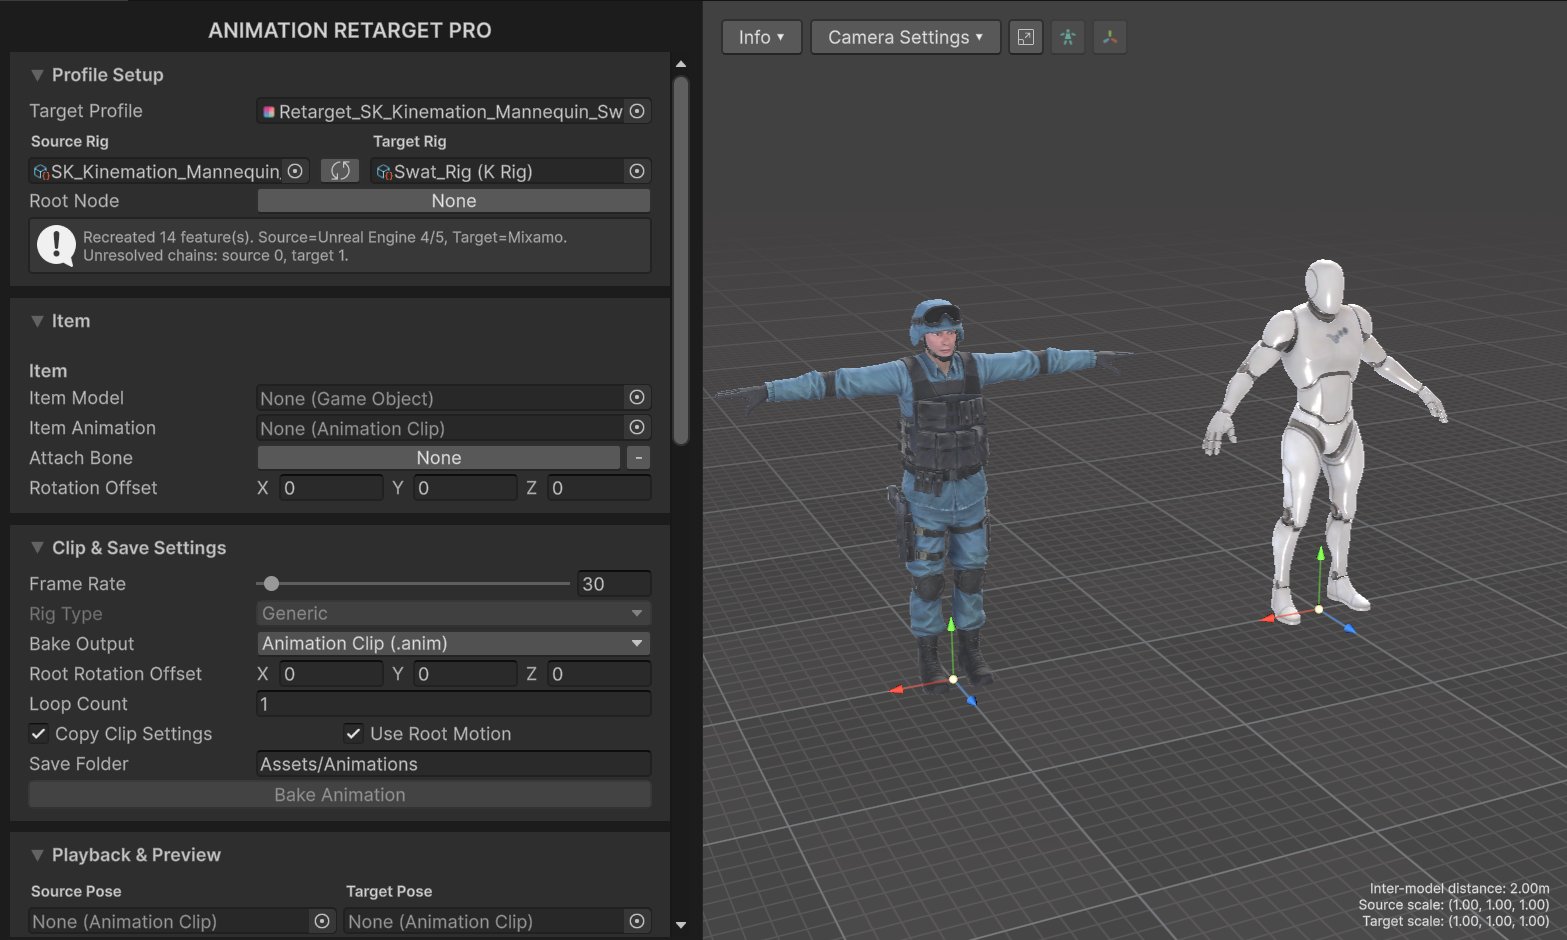 **Tip**: To find out more about this editor window, see [Retarget Window](/retarget-pro/workflow/retarget-window).
Now, we need to assign base poses.
## Initial Poses
Both characters should have similar poses as this directly impacts retargeting quality.
**Retarget Pro** comes with T pose Animation Clips for popular skeletons:
**Tip**: To find out more about this editor window, see [Retarget Window](/retarget-pro/workflow/retarget-window).
Now, we need to assign base poses.
## Initial Poses
Both characters should have similar poses as this directly impacts retargeting quality.
**Retarget Pro** comes with T pose Animation Clips for popular skeletons:
 Assign "Source" and "Target" pose clips if character look different in the preview.
 ## Bone Chains
Scroll down to the **"Bone Chain Settings"** section. It displays a list of all retarget features:
## Bone Chains
Scroll down to the **"Bone Chain Settings"** section. It displays a list of all retarget features:
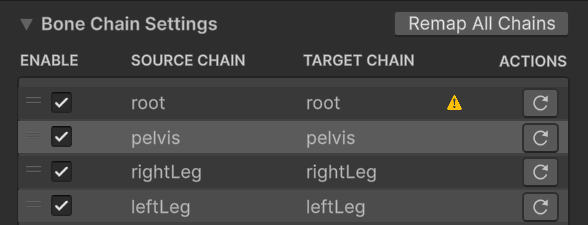 Note: **Retarget Pro** natively supports *Mixamo*, *Synty*, *Character Creator*, *UE/UE5*, *Humanoid* and *Quadruped* skeletons out of the box.
Sometimes, the plugin may not map bones correctly — such chains will have a warning icon. To fix it, click on the feature and manually pick the bones:
Note: **Retarget Pro** natively supports *Mixamo*, *Synty*, *Character Creator*, *UE/UE5*, *Humanoid* and *Quadruped* skeletons out of the box.
Sometimes, the plugin may not map bones correctly — such chains will have a warning icon. To fix it, click on the feature and manually pick the bones:
