> ## Documentation Index
> Fetch the complete documentation index at: https://docs.kinemation.xyz/llms.txt
> Use this file to discover all available pages before exploring further.
# Animation override
> Retarget Sci-Fi FPS Pack animations to a custom Unity character and manage generated overrides.
export const productName_0 = "Sci-Fi FPS Pack"
export const packConfigName_0 = "Sci-Fi FPS"
export const sourceModel_0 = "SKM_SciFi_Arms"
export const sourcePose_0 = "Assets/KINEMATION/Shared/GameplayFramework/Poses/A_TPose_UE5.anim"
export const outputFolder_0 = "Assets/MyGame/Animations/SciFiFPS/Retargeted/MyCharacter"
Complete [Character setup](/sci-fi-fps-pack/unity/get-started/character-setup) before you create an override. The target character must have a valid `GameplayAnimationController` skeleton map.
## Create an animation override
An animation override maps the animations authored for {productName_0} to baked copies for your target character. The source assets stay unchanged. If an entry has no replacement, Gameplay Framework uses the original animation.
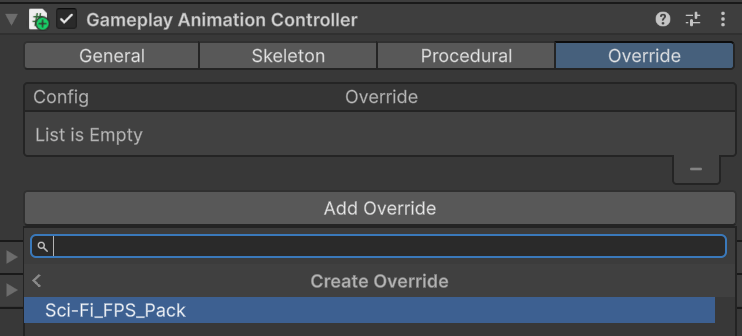
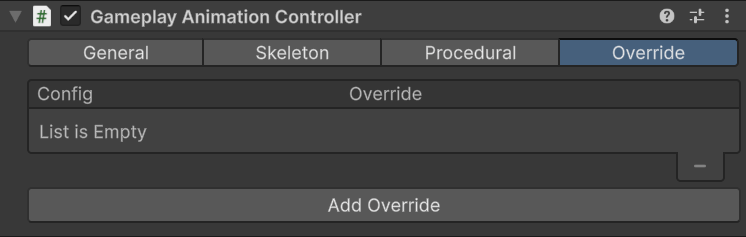
Select your configured character. Open `GameplayAnimationController`, then select the **Override** tab.
Click **Add Override > Create Override > {packConfigName_0}**.
Gameplay Framework creates an override asset next to the selected pack config, adds it to the controller, and opens **Animation Override Retarget**.
 You can also create an empty asset with **Assets > Create > KINEMATION > Gameplay Framework > Animation Override**. Use the controller workflow when possible because it assigns the pack config and target character for you.
## Configure retargeting
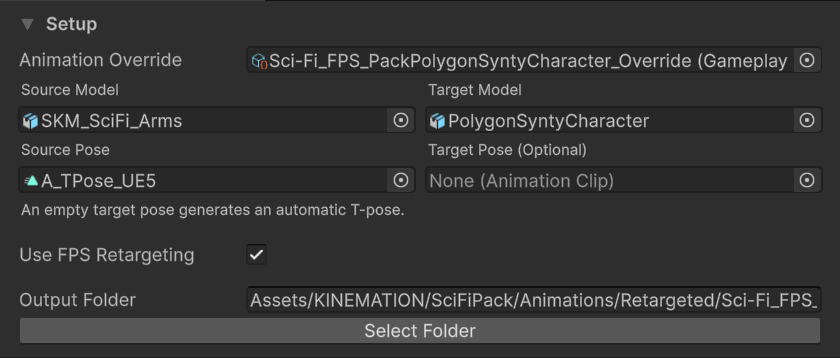
Open the **Setup** tab and review every field before baking. On first open, the window suggests a `Retargeted/` folder beside the override asset. Select a folder in your own project content when you want generated files to stay separate from the imported pack.
| Field | Use |
| ----------------------- | ------------------------------------------------------------------------------------------------------------------------------------------------------------------ |
| **Source Model** | The supplied source character:
You can also create an empty asset with **Assets > Create > KINEMATION > Gameplay Framework > Animation Override**. Use the controller workflow when possible because it assigns the pack config and target character for you.
## Configure retargeting
Open the **Setup** tab and review every field before baking. On first open, the window suggests a `Retargeted/` folder beside the override asset. Select a folder in your own project content when you want generated files to stay separate from the imported pack.
| Field | Use |
| ----------------------- | ------------------------------------------------------------------------------------------------------------------------------------------------------------------ |
| **Source Model** | The supplied source character: {sourceModel_0}. |
| **Target Model** | Your custom character. Use the same rig you configured on the Character setup page. |
| **Source Pose** | The source reference pose: {sourcePose_0}. |
| **Target Pose** | An optional correction pose for your character. Leave it empty to generate an automatic T-pose, or assign one when the shoulders, wrists, or fingers do not align. |
| **Use FPS Retargeting** | Keeps the first-person hands and weapon relationship stable. Disable it only when you intentionally want a conventional full-body transfer. |
| **Output Folder** | A folder inside `Assets`, such as {outputFolder_0}. |
 ## Adjust the retarget result
Use the retarget preview before baking the complete pack. The **Target Pose** and viewport handles solve different problems.
1. Compare the source and target characters in the same stance.
2. Assign a **Target Pose** asset when the target's reference shoulders, wrists, or fingers do not match the source pose.
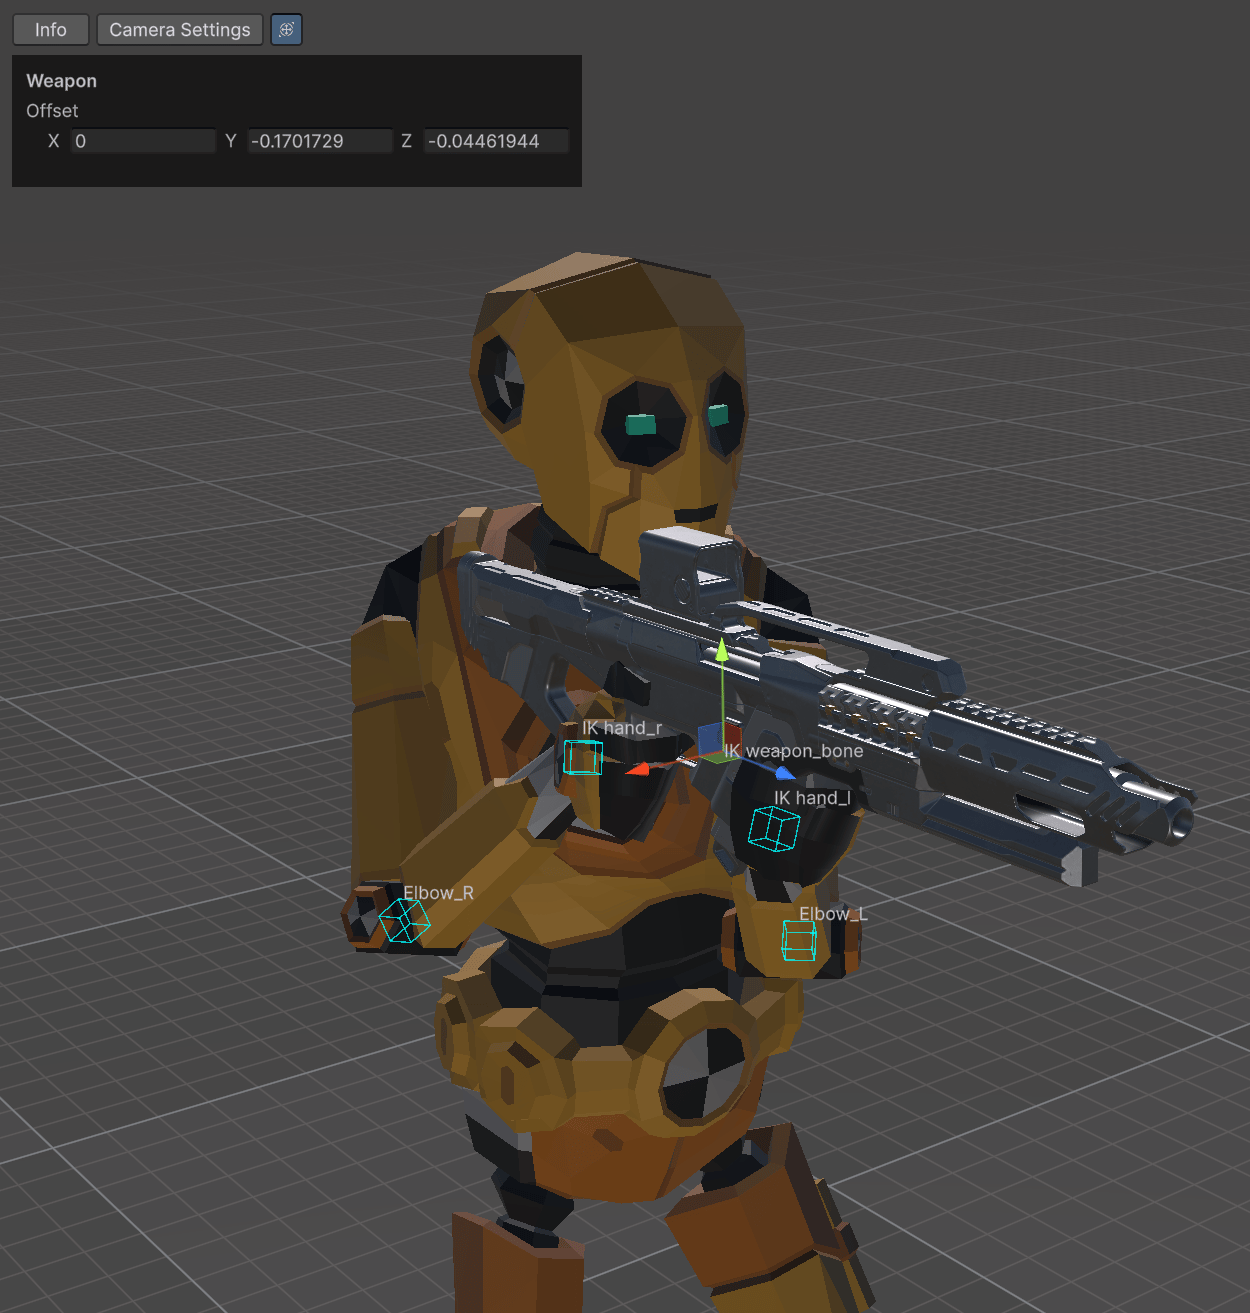
3. Enable the transform controls and select the weapon, hand, foot, arm-pole, or leg-pole target you need to correct.
4. Move the handle to adjust that IK target. The window stores these offsets on the animation override.
5. Keep the weapon and hand relationship readable from the first-person camera. **Use FPS Retargeting** also exposes the weapon target.
6. Bake one idle animation first and inspect it in Play mode before processing a weapon set.
## Adjust the retarget result
Use the retarget preview before baking the complete pack. The **Target Pose** and viewport handles solve different problems.
1. Compare the source and target characters in the same stance.
2. Assign a **Target Pose** asset when the target's reference shoulders, wrists, or fingers do not match the source pose.
3. Enable the transform controls and select the weapon, hand, foot, arm-pole, or leg-pole target you need to correct.
4. Move the handle to adjust that IK target. The window stores these offsets on the animation override.
5. Keep the weapon and hand relationship readable from the first-person camera. **Use FPS Retargeting** also exposes the weapon target.
6. Bake one idle animation first and inspect it in Play mode before processing a weapon set.
 ## Bake animations weapon by weapon
Open the **Animations** tab. The window groups character animation assets by weapon and lists Animator Controllers separately.
Expand a weapon group and select the clips you want to test. Use **All** or **None** within that group instead of baking every category immediately.
Select the matching Animator Controller when the pack config provides one. Controllers are rebuilt with the retargeted clips.
Click **Bake Selected To Override**. Repeat the process for each weapon after you verify the previous group.
## Bake animations weapon by weapon
Open the **Animations** tab. The window groups character animation assets by weapon and lists Animator Controllers separately.
Expand a weapon group and select the clips you want to test. Use **All** or **None** within that group instead of baking every category immediately.
Select the matching Animator Controller when the pack config provides one. Controllers are rebuilt with the retargeted clips.
Click **Bake Selected To Override**. Repeat the process for each weapon after you verify the previous group.
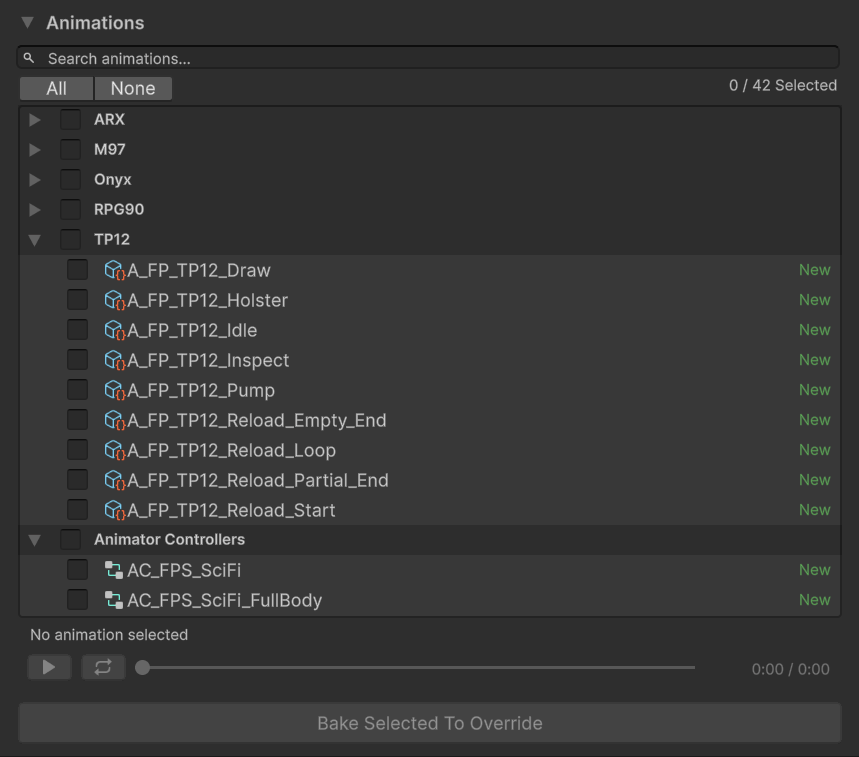 The status column reports the current state:
* **New**: no baked replacement exists.
* **Baked**: the replacement matches the current source asset.
* **Outdated**: the source asset changed after the last bake.
## Find the generated assets
The retargeter stores output below the selected folder:
| Folder | Generated content |
| ---------------- | --------------------------------------------------------------------------------------- |
| `FBX` | Baked clips named `_.fbx`. |
| `GameplayAssets` | Retargeted `GameplayAnimationAsset` copies named `_Retargeted.asset`. |
| `Controllers` | `AnimatorOverrideController` assets named `_Retargeted.overrideController`. |
Rebaking updates these paths and refreshes the replacement map in the animation override.
## Manage multiple overrides
You can add multiple override assets in the controller's **Override** tab. Gameplay Framework checks them in list order. The first override with a valid replacement wins; otherwise, evaluation continues and eventually falls back to the original asset.
Keep overrides focused on separate packs or non-overlapping animation sets. If two overrides replace the same source asset, remove and add them again in the priority you want.
The status column reports the current state:
* **New**: no baked replacement exists.
* **Baked**: the replacement matches the current source asset.
* **Outdated**: the source asset changed after the last bake.
## Find the generated assets
The retargeter stores output below the selected folder:
| Folder | Generated content |
| ---------------- | --------------------------------------------------------------------------------------- |
| `FBX` | Baked clips named `_.fbx`. |
| `GameplayAssets` | Retargeted `GameplayAnimationAsset` copies named `_Retargeted.asset`. |
| `Controllers` | `AnimatorOverrideController` assets named `_Retargeted.overrideController`. |
Rebaking updates these paths and refreshes the replacement map in the animation override.
## Manage multiple overrides
You can add multiple override assets in the controller's **Override** tab. Gameplay Framework checks them in list order. The first override with a valid replacement wins; otherwise, evaluation continues and eventually falls back to the original asset.
Keep overrides focused on separate packs or non-overlapping animation sets. If two overrides replace the same source asset, remove and add them again in the priority you want.
 ## Next step
Continue to [Making adjustments](/sci-fi-fps-pack/unity/get-started/making-adjustments) to tune procedural features and animation curve properties.
## Next step
Continue to [Making adjustments](/sci-fi-fps-pack/unity/get-started/making-adjustments) to tune procedural features and animation curve properties.