> ## Documentation Index
> Fetch the complete documentation index at: https://docs.kinemation.xyz/llms.txt
> Use this file to discover all available pages before exploring further.
# Character setup
> Add the Sci-Fi FPS Pack components, camera, input, and skeleton mapping to a custom Unity character.
export const productName_0 = "Sci-Fi FPS Pack"
export const packConfigName_0 = "Sci-Fi FPS"
export const controllerComponent_0 = "ShooterControllerExample"
export const postSetupNote_0 = "The Sci-Fi config assigns the supplied Player input map, first-person camera settings, six item prefabs, and Shooter Controller Example defaults. Pack Setup reuses compatible components already present on the character."
This page configures the runtime foundation before you retarget any animations.
## Before you begin
* Import the Sci-Fi FPS Pack and resolve all script compilation errors.
* Add the Input System package used by the supplied example controller.
* Prepare one character prefab or model with an `Animator`.
* Open an editable scene.
## Set up {productName_0}
Use Pack Setup to add the shared Gameplay Framework components to your character.
Drag the character prefab or model into an editable scene. Select the character root that contains the `Animator`.
Pack Setup only accepts one scene GameObject. Do not select a prefab asset, child bone, or multiple objects.
Right-click the selected character in the Hierarchy. Choose **KINEMATION > Pack Setup**.
You can also use **GameObject > KINEMATION > Pack Setup** from the main menu.
Select **{packConfigName_0}** from the pack list. Click **Set Up Character**.
 Select the character root and inspect the generated setup.
 ## Component checklist
| Object | Component | Responsibility |
| ---------------------------------- | ------------------------------------------- | ---------------------------------------------------------------------------- |
| Character root | `Animator` | Plays the configured locomotion controller. |
| Character root | `PlayerInput` | Sends actions from the `Player` action map to the example controller. |
| Character root | `CharacterController` | Provides collision and movement for the example. |
| Character root |
## Component checklist
| Object | Component | Responsibility |
| ---------------------------------- | ------------------------------------------- | ---------------------------------------------------------------------------- |
| Character root | `Animator` | Plays the configured locomotion controller. |
| Character root | `PlayerInput` | Sends actions from the `Player` action map to the example controller. |
| Character root | `CharacterController` | Provides collision and movement for the example. |
| Character root | {controllerComponent_0} | Drives movement and pack-specific gameplay inputs. |
| Character root | `GameplayAnimationController` | Maps the skeleton and evaluates animation overrides and procedural features. |
| Character root | `RecoilAnimation` | Produces the recoil transform consumed by Shooter Core. |
| Character root | `AudioSource` | Plays item and weapon sounds. |
| `Camera` child | `Camera`, `AudioListener`, `GameplayCamera` | Follows the first-person socket and applies camera animation. |
| `FirstPersonSocket` below the head | Skeleton socket | Anchors the first-person camera to the mapped character rig. |
{postSetupNote_0}
## Verify the skeleton
Open the **Skeleton** tab on `GameplayAnimationController`. Select the closest preset and click **Auto Map Bones** if any required group is incomplete. Check the lower body, spine, neck, arms, fingers, and IK groups before you continue.
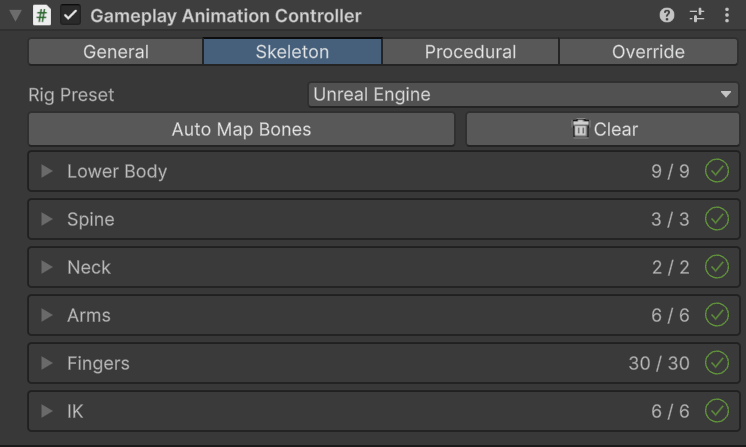 The character is ready when every required skeleton group is mapped, the camera references `FirstPersonSocket`, and the Console contains no setup errors.
## Next step
Continue to [Animation override](/sci-fi-fps-pack/unity/get-started/animation-override) to retarget the supplied animation sets to this character.
The character is ready when every required skeleton group is mapped, the camera references `FirstPersonSocket`, and the Console contains no setup errors.
## Next step
Continue to [Animation override](/sci-fi-fps-pack/unity/get-started/animation-override) to retarget the supplied animation sets to this character.