> ## Documentation Index
> Fetch the complete documentation index at: https://docs.kinemation.xyz/llms.txt
> Use this file to discover all available pages before exploring further.
# 🔌Components
> In this section we will learn about the core components.
## Overview
After the previous step, these components had been added to our character:
 ## FPS Animator
It is a central hub component, which controls the flow of all entities in the framework, by initializing, updating, and disposing of other components.
## FPS Bone Controller
This component applies procedural animation features. It does not have any special properties, hence there is no special setup for this component.
## User Input Controller
The **FPS Animation Framework** introduces a standalone input property system. The idea is that you can define custom properties in the **Input Config** asset and use them in runtime:
## FPS Animator
It is a central hub component, which controls the flow of all entities in the framework, by initializing, updating, and disposing of other components.
## FPS Bone Controller
This component applies procedural animation features. It does not have any special properties, hence there is no special setup for this component.
## User Input Controller
The **FPS Animation Framework** introduces a standalone input property system. The idea is that you can define custom properties in the **Input Config** asset and use them in runtime:
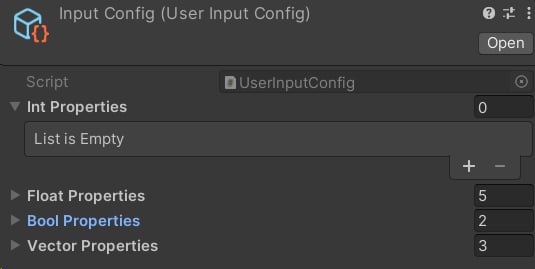 This system is used to establish communication between the framework entities and your project codebase.
**Example:** let's say you want to disable aiming when jumping. You can create a new float parameter, set it to 1 or 0 in code based on the jumping condition, and then specify that parameter as a control value in the Ads Layer.
**User Input Controller** allows you to work with the property system, by getting or setting the values:
This system is used to establish communication between the framework entities and your project codebase.
**Example:** let's say you want to disable aiming when jumping. You can create a new float parameter, set it to 1 or 0 in code based on the jumping condition, and then specify that parameter as a control value in the Ads Layer.
**User Input Controller** allows you to work with the property system, by getting or setting the values:
 **Tip:** the User Input Component inspector has a really neat feature - it displays all the properties in play mode, and you can even modify them.
## Playables Controller
This component controls how Animation Clips are played in runtime. It uses [Unity Playables API](https://docs.unity3d.com/Manual/Playables.html) to add custom animation layers, that allow you to play animations right from code.
Create a new Avatar mask, select the upper body bones, and assign it to this component:
**Tip:** the User Input Component inspector has a really neat feature - it displays all the properties in play mode, and you can even modify them.
## Playables Controller
This component controls how Animation Clips are played in runtime. It uses [Unity Playables API](https://docs.unity3d.com/Manual/Playables.html) to add custom animation layers, that allow you to play animations right from code.
Create a new Avatar mask, select the upper body bones, and assign it to this component:
 Your upper body mask needs to be adjusted to play custom animations. To do this, go to **Window/FPS ANIMATOR/Tools/Avatar Mask Modifier.** Now we need to add the WeaponBone object to the avatar mask. Specify the *Root* and the *Upper Body Mask*:
 **Tip:** the WeaponBone will be used later in the animation workflow, essentially it contains the weapon movement.
The **Playables Weight Property** is used to control the influence of the Playbles Controller. You can specify here any float value from the input system, but it is recommended to leave the PlayablesWeight as a default value.
You can also use this component to preview animations in the editor. Just select your animations and hit the preview button!
## Execution order
Lastly, we need to adjust the *Script Execution Order* in the *Project Settings*. Go to the **Edit/Project Settings/Script Execution Order** and make sure to put the **FPS Animator** after your controller class:
**Tip:** the WeaponBone will be used later in the animation workflow, essentially it contains the weapon movement.
The **Playables Weight Property** is used to control the influence of the Playbles Controller. You can specify here any float value from the input system, but it is recommended to leave the PlayablesWeight as a default value.
You can also use this component to preview animations in the editor. Just select your animations and hit the preview button!
## Execution order
Lastly, we need to adjust the *Script Execution Order* in the *Project Settings*. Go to the **Edit/Project Settings/Script Execution Order** and make sure to put the **FPS Animator** after your controller class:
 **Tip:** this step is required for the proper input update process, so the **FPS Animator** can use the latest user data to avoid lagging.
It is also important to initialize the **FPS Animator** component in the controller. This can be done by calling the *Initialize()* method:
***
At this point, the character setup is complete. In the next section, we will learn about the procedural animation assets.
**Tip:** this step is required for the proper input update process, so the **FPS Animator** can use the latest user data to avoid lagging.
It is also important to initialize the **FPS Animator** component in the controller. This can be done by calling the *Initialize()* method:
***
At this point, the character setup is complete. In the next section, we will learn about the procedural animation assets.