> ## Documentation Index
> Fetch the complete documentation index at: https://docs.kinemation.xyz/llms.txt
> Use this file to discover all available pages before exploring further.
# Character setup
> This page explains how to use your own character with Survival Pack.
\## Before you begin
Follow [Installation](https://docs.kinemation.xyz/survival-pack/unreal/get-started/installation.md) and confirm that the
demo runs. Import your custom Skeletal Mesh before continuing.
\## Add virtual bones
Virtual bones are helper bones that the Animation Blueprints use for IK.
Add the following virtual bones to your character's Skeleton. The procedural animation uses them to position the hands, held item, elbows, and camera.
Open the Skeleton and find the parent bone in the **Skeleton Tree**. Right-click it, choose **Add Virtual Bone**, and select the target bone. Rename the new entry to match the table, including Unreal's `VB` prefix.
Add the bones in the listed order so each parent exists before you create its children.
\
Virtual bone
Parent
Target
\
Keep existing entries if their names, parents, and targets already match. Save the Skeleton before continuing.
\## Retarget the animations
For UE5 source animations, use `/Game/KINEMATION/Survival_FPS_Pack/Animations/Character/UE5/DA_SurvivalPack_Config`. Its retargeter is `UE5/Retargeting/IKRetargeter_UE5_UE5`, relative to the Character animation folder.
For UE4 source animations, use `UE4/DA_SurvivalPack_UE4_Config` and `UE4/Retargeting/IKRetargeter_UE4_UE4`. Choose the configuration and retargeter for the same source family.
The examples below call your custom mesh `SKM_Operator` and
its override `DA_SKM_Operator_Override`. Use your own asset names
when following the steps.
Retargeting adapts the pack's animations to your character's Skeleton. An animation override stores the replacements, so you do not need to change the animation references on every item.
\**1. Create an animation override**
In the **Content Browser**, right-click `SKM_Operator` and select **Scripted Asset Actions ▸ Create Animation Override**. This creates `DA_SKM_Operator_Override`.
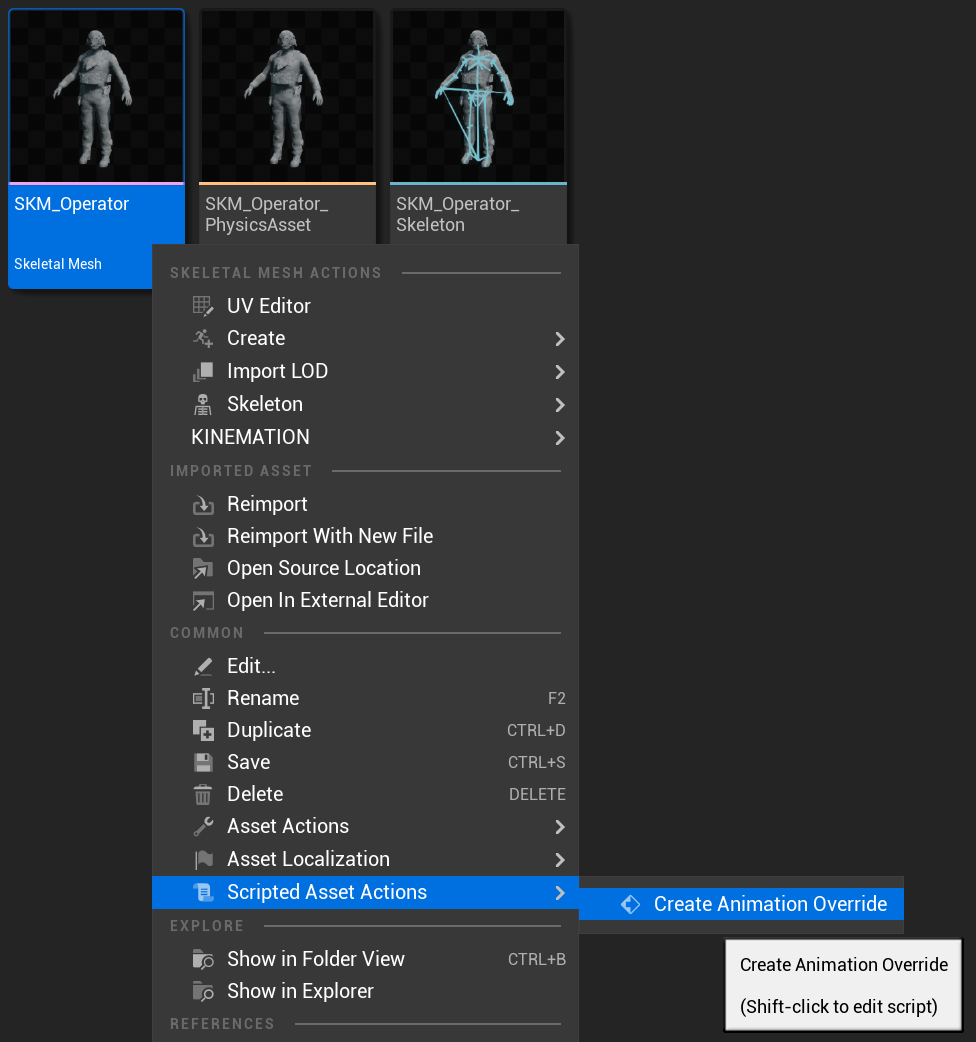
Create an animation override from your custom Skeletal Mesh.
\**2. Select the animation configuration**
Open the override. Set **Config** to `DA_SurvivalPack_Config` and **Character Mesh** to your model. The configuration lists the pack's source animations and Animation Blueprints.
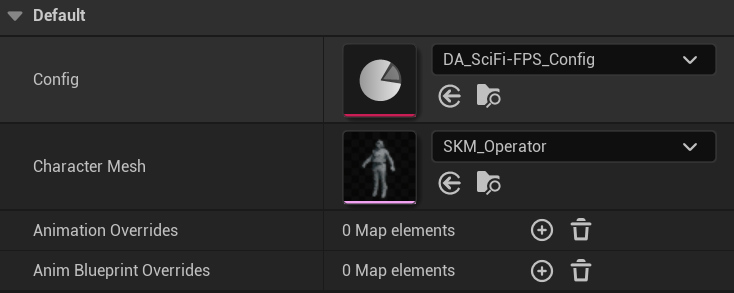
Assign the pack's configuration and your character mesh. The screenshot illustrates the shared interface.
\**3. Retarget the animations**
Right-click the override and select **Scripted Asset Actions ▸ Retarget Animations**.
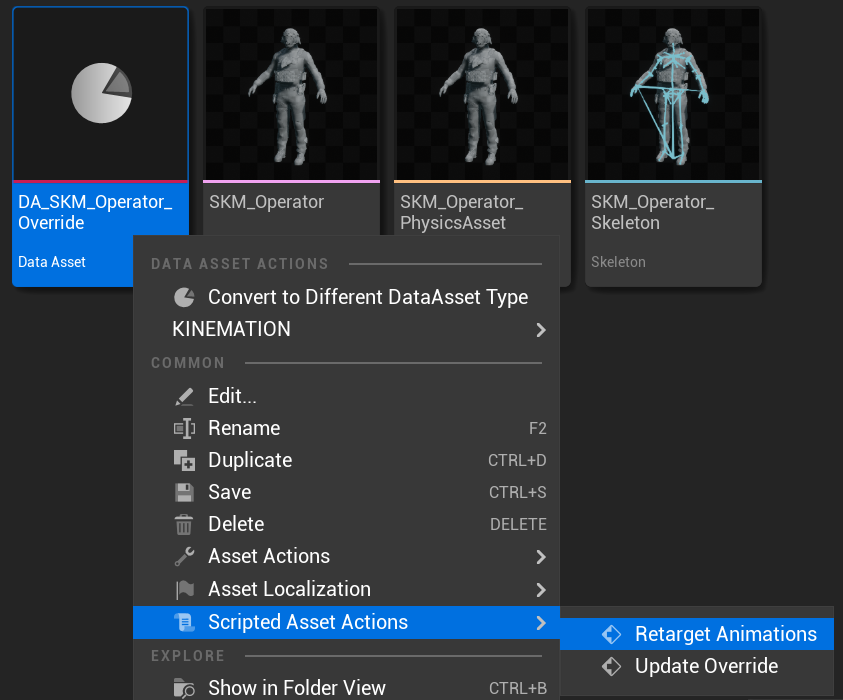
Open Retarget Animations for the override asset.
Choose your **IKRetargeter**. The example uses `IKRetargeter_UE5_UE5`. Check the **Source Mesh** and **Target Mesh**, review the **Animations** and **Anim Blueprints** lists, then click **Retarget**.
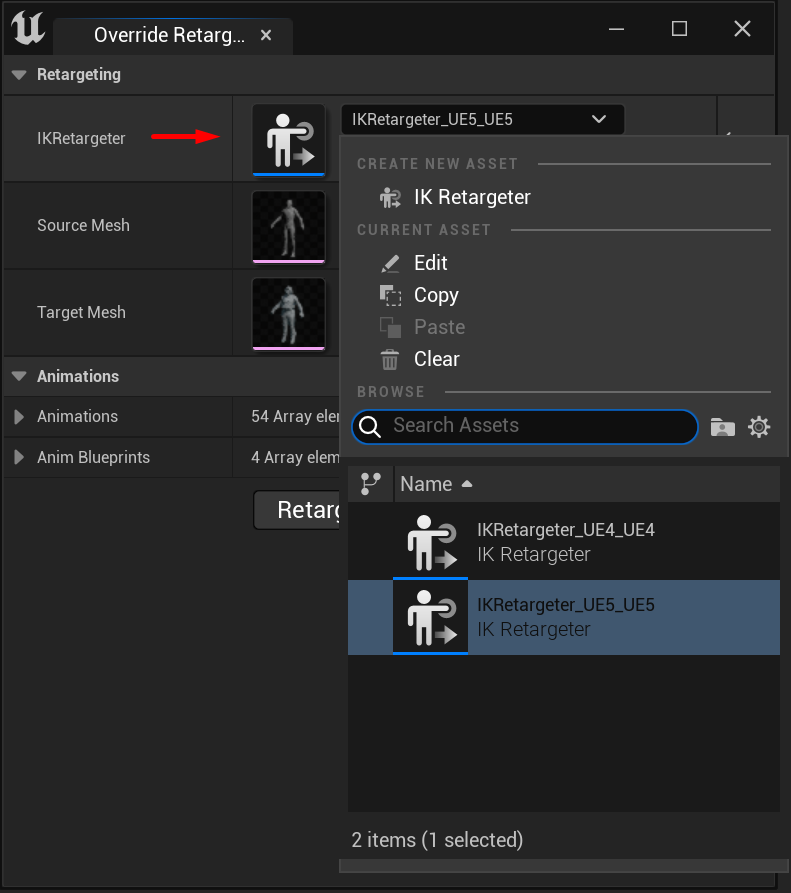
Choose an IK Retargeter for your source and target Skeletons.
\**4. Save the results**
Choose a folder for the retargeted assets, such as `Retargeted`. Then right-click `DA_SKM_Operator_Override` and select **Scripted Asset Actions ▸ Update Override**. This adds the retargeted animations and Animation Blueprints to the override.
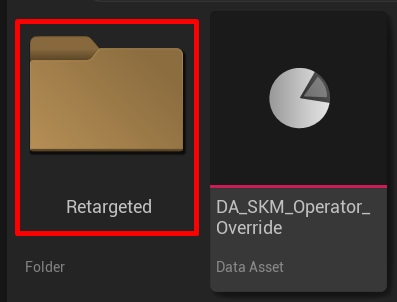
Save the generated animations and Animation Blueprints in your project folder.
\### After a pack update
Use the same override workflow when an update to Survival Pack adds or changes animations. Check that the configuration includes those animations, retarget them for your character, and run **Update Override** again. Keep your override assigned to the character so it uses the updated animations.
\## Set up the character Blueprint
Go to `/Game/KINEMATION/Survival_FPS_Pack/Blueprints` and find `BP_Survival_Character`. Right-click it and choose **Duplicate**. Name the copy `BP_Survival_Example_Character`, then open it.

The Survival character inherits the components used by its animation, camera, movement, and recoil.
The character already includes the components needed for movement, animation, camera motion, and recoil. Select **Mesh** to change the character model and `AC_GameplayAnimation` to assign the animation override in the next step.
Open **Class Defaults** to adjust the character settings:
\
Setting
What it does
**Item Classes**
The weapons and items available to the character.
\
**Movement Speeds**
The character's movement speeds.
\
**Mouse Sensitivity**
How quickly the character turns when you move the mouse.
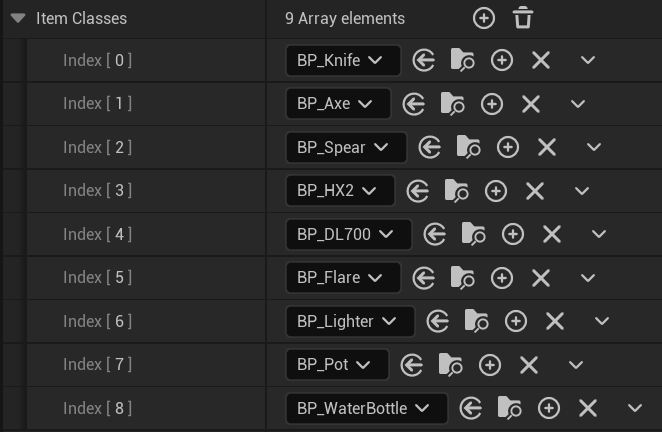
Item Classes selects the regular weapons, tools, and water bottle.
See [Character](https://docs.kinemation.xyz/survival-pack/unreal/general/character.md) for more details about the components and settings.
Choose food and medicine in **Consumable Classes**. These items temporarily replace the regular equipment while you use them.
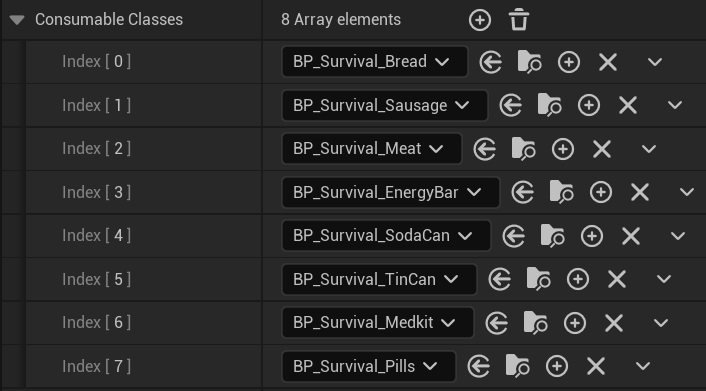
Consumable Classes selects food and medicine separately from regular equipment.
\## Assign the animation override
Open `BP_Survival_Example_Character`. Select **Mesh** and set **Skeletal Mesh Asset** to your character model, shown here as `SKM_Operator`.
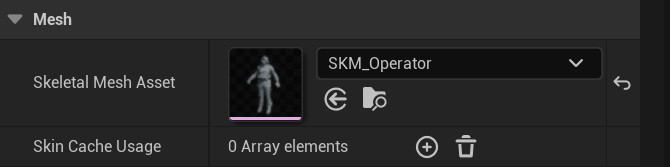
Set your target mesh on the character Blueprint's Mesh component.
Select the character's `AC_GameplayAnimation` component and add `DA_SKM_Operator_Override` to **Overrides**. Compile and save the Blueprint.
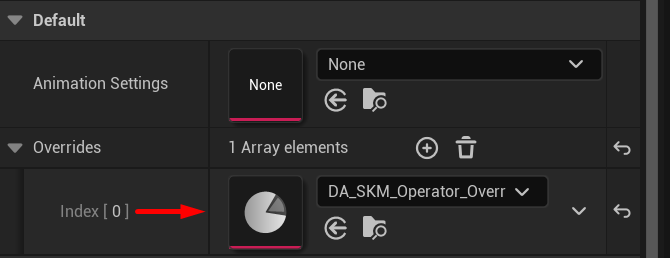
Add the animation override to the character's animation component.
\## Test your character
Set `BP_Survival_Example_Character` as the GameMode's
\**Default Pawn Class**. Assign that GameMode in the map's
\**World Settings**. See
\[Project integration](https://docs.kinemation.xyz/survival-pack/unreal/tutorials/project-integration.md) for the GameMode and
input setup.
Press Play and test movement, item use, projectile release, a consumable sequence, and item switching.
Check that the hands stay aligned with the item. If animation looks wrong,
check the virtual bones, IK Retargeter, and assigned override.
Continue to [Making adjustments](https://docs.kinemation.xyz/survival-pack/unreal/get-started/making-adjustments.md) to tune item
placement and motion.
This documentation is built and hosted on [Mintlify](https://mintlify.com), a developer documentation platform.