> ## Documentation Index
> Fetch the complete documentation index at: https://docs.kinemation.xyz/llms.txt
> Use this file to discover all available pages before exploring further.
# 🏃♂️Retargeting Animations
> This page explains how to retarget animations to a different skeleton.
**Note**: This tutorial requires **Retarget Pro**, and it only works with **Generic** characters.
## Overview
Before we start, make sure to import Retarget Pro to your project:
 **Tip**: If the asset doesn't show up in Package Manager, go to the Unity Asset Store and add Retarget Pro to your library (for free).
## Rig Assets
Add your character and Operator models to the scene. We will use the Mixamo Swat model as an example in this tutorial.
**Tip**: If the asset doesn't show up in Package Manager, go to the Unity Asset Store and add Retarget Pro to your library (for free).
## Rig Assets
Add your character and Operator models to the scene. We will use the Mixamo Swat model as an example in this tutorial.
 Next, select the Operator model and find the "root" bone:
 Right-click on it, choose "Auto Rig Mapping" and click "Create Rig Mapping".
 This action will create a Scriptable Object (data asset) in the current folder:
 **Tip**: *Rig Assets* contain skeleton bones used in a character model.
Before creating a Rig Asset for our custom character, we need to add custom bones:
**Tip**: *Rig Assets* contain skeleton bones used in a character model.
Before creating a Rig Asset for our custom character, we need to add custom bones:
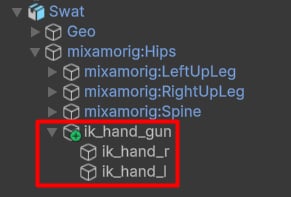 * **ik\_hand\_gun** — This bone contains weapon movement.
* **ik\_hand\_r** — This is an IK target for the right hand.
* **ik\_hand\_l** — This is an IK target for the left hand.
Create these empty Game Objects and parent them to the root bone in the skeleton.
Then, create a new Rig Asset for your custom character just like we did previously with the Operator model.
## Retarget Profile
Select the Operator and your character Rig Assets one by one, then right-click and select "Create Retarget Profile":
* **ik\_hand\_gun** — This bone contains weapon movement.
* **ik\_hand\_r** — This is an IK target for the right hand.
* **ik\_hand\_l** — This is an IK target for the left hand.
Create these empty Game Objects and parent them to the root bone in the skeleton.
Then, create a new Rig Asset for your custom character just like we did previously with the Operator model.
## Retarget Profile
Select the Operator and your character Rig Assets one by one, then right-click and select "Create Retarget Profile":
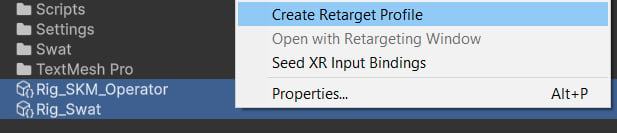 Select the profile and assign the source pose to "T\_Pose\_UE5":
 Source and Target clips will be sampled before the retargeting starts.
**Note**: It's important that characters have similar poses — this directly influences the retargeting quality.
Right-click on the profile and select "Open with Retargeting Window".
Source and Target clips will be sampled before the retargeting starts.
**Note**: It's important that characters have similar poses — this directly influences the retargeting quality.
Right-click on the profile and select "Open with Retargeting Window".
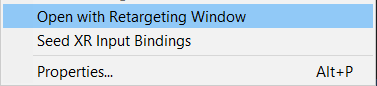
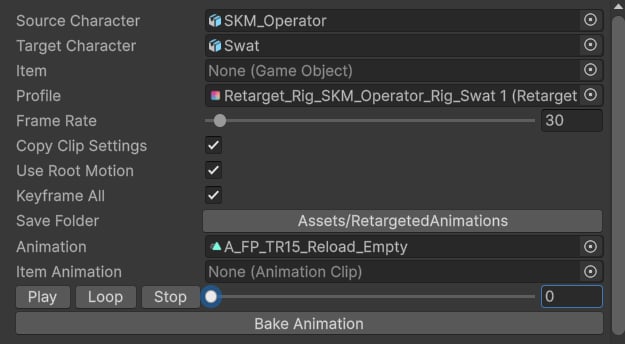 Next, assign the Source and Target character prefabs, as well as the animation to retarget. Remove all generated bone chains, and add these features to the profile.
### Pelvis
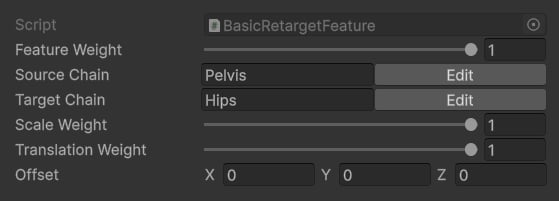
Add a BasicRetargetFeature and select pelvis/hip bones in the source and target chains. Set the translation weight to 1.
Next, assign the Source and Target character prefabs, as well as the animation to retarget. Remove all generated bone chains, and add these features to the profile.
### Pelvis
Add a BasicRetargetFeature and select pelvis/hip bones in the source and target chains. Set the translation weight to 1.
 ### Legs
Add 2 IKRetargetFeatures and select the left and right leg bones (e.g., upper leg, lower leg, foot).
### Legs
Add 2 IKRetargetFeatures and select the left and right leg bones (e.g., upper leg, lower leg, foot).
 ### Spine
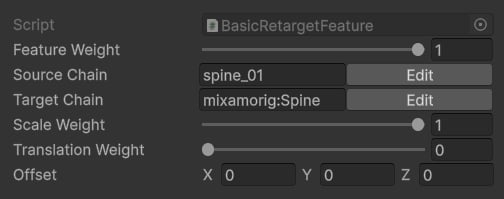
Add a BasicRetargetFeature and select spine bones (including the neck and the head).
**Tip**: It's important to match the numbers of bones in Source and Target chains.
### Spine
Add a BasicRetargetFeature and select spine bones (including the neck and the head).
**Tip**: It's important to match the numbers of bones in Source and Target chains.
 ### FPS Retargeter
Add a **FPSRetargetFeature** and select arm and weapon bones in the inspector.
**Tip**: All animations in the Tactical Shooter Pack use ik\_hand\_gun to bake gun movement, so a weapon bone plays an important role in this retargeting setup.
### FPS Retargeter
Add a **FPSRetargetFeature** and select arm and weapon bones in the inspector.
**Tip**: All animations in the Tactical Shooter Pack use ik\_hand\_gun to bake gun movement, so a weapon bone plays an important role in this retargeting setup.
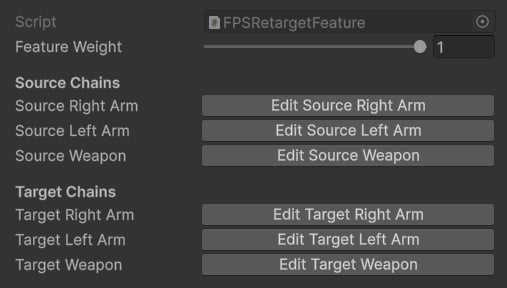 The arms should only include 3 bones: upper arm, lower arm and a hand.
 ### Fingers
Finally, add 5 BasicRetargetFeatures for every finger bone: thumb, index, middle, ring and pinky.
### Fingers
Finally, add 5 BasicRetargetFeatures for every finger bone: thumb, index, middle, ring and pinky.
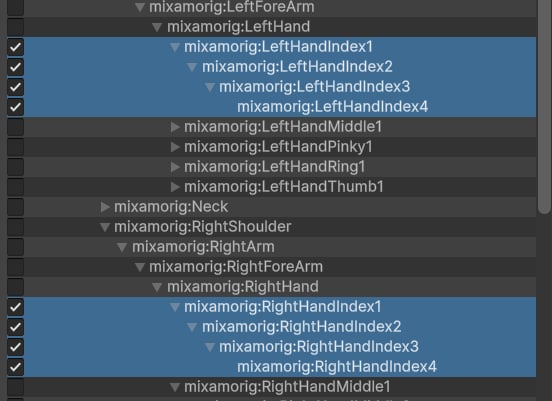
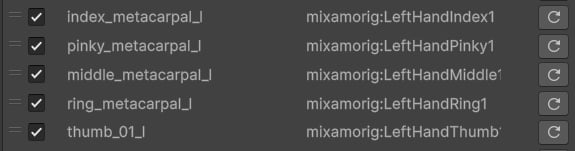 It's not necessarily important to separate left and right hand fingers. For example, it's possible to use both in a single bone chain:
 ## Retargeting
Once the Retarget Profile is configured, select an animation clip to retarget and press "Play":
## Retargeting
Once the Retarget Profile is configured, select an animation clip to retarget and press "Play":
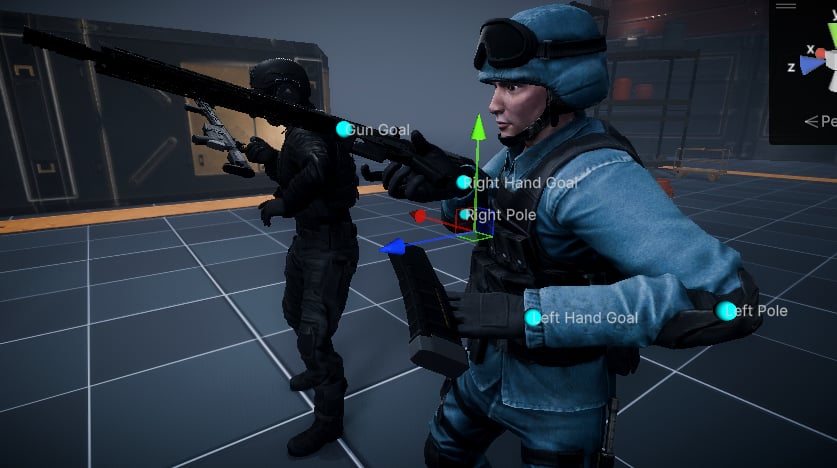
 Use the control Gizmos to position hands and the weapon.
It's also possible to preview an animation on the gun — add a gun mesh to the weapon bone.
Use the control Gizmos to position hands and the weapon.
It's also possible to preview an animation on the gun — add a gun mesh to the weapon bone.
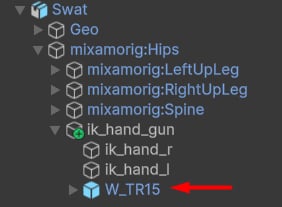 Then, drag it into the "Item" field:
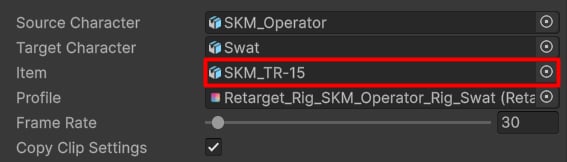 Finally, assign the animation clip for the gun in the "Item Animation" field:
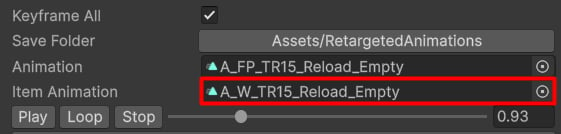 This will automatically animate the weapon for easier retargeting: