
Step 1 - Recoil Animation Component
First, it is essential to add the Recoil Animation Component to the character.- Option
- Option
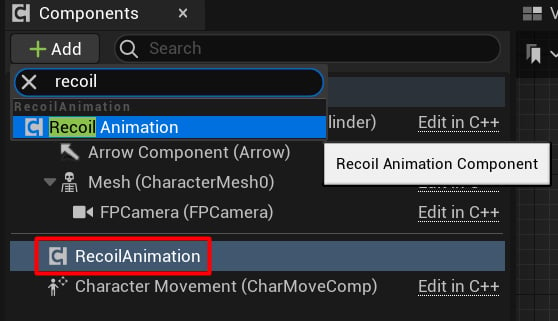
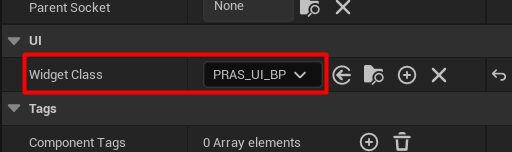
Select this blueprint.
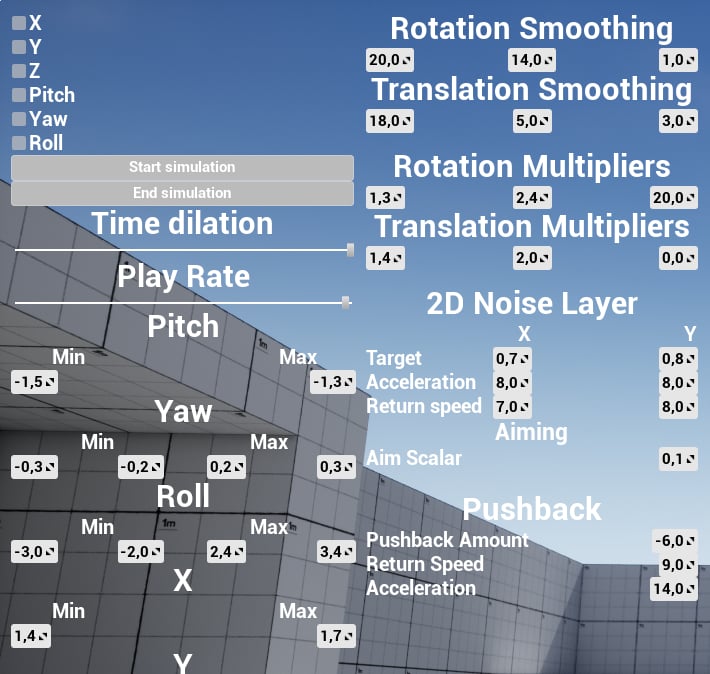
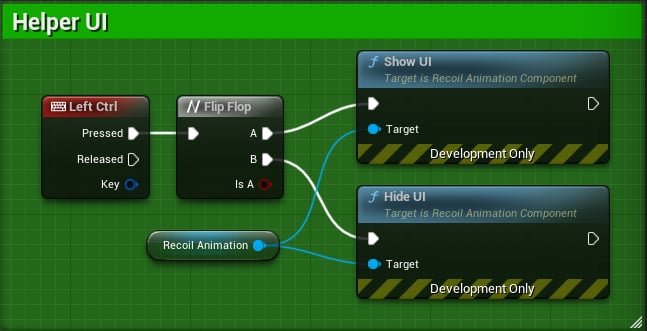
How to use helper UI.
Step 2 - Initialize and Play
Make sure to call theInit method of the Recoil Animation Component to initialize the recoil animation:
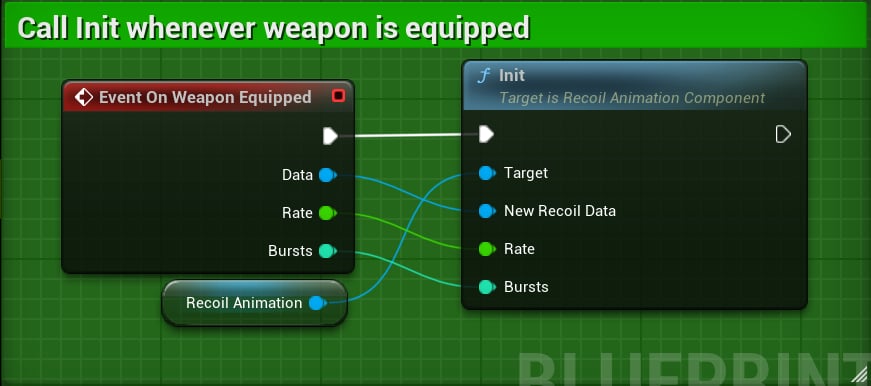
Init function.
- Data: Recoil Data asset.
- Rate: fire rate or RPM (Rounds-per-minute).
- Burst: length of the burst sequence**.**
Play and Stop methods when firing:
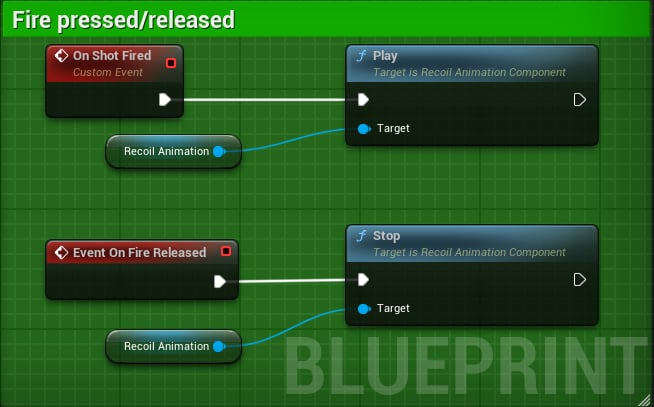
Firing logic.
Step 3 - Animation Blueprint Integration
Make sure to add a Recoil Animation node to the Anim Graph: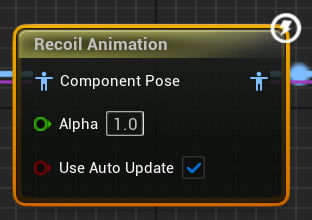
This node will apply recoil.
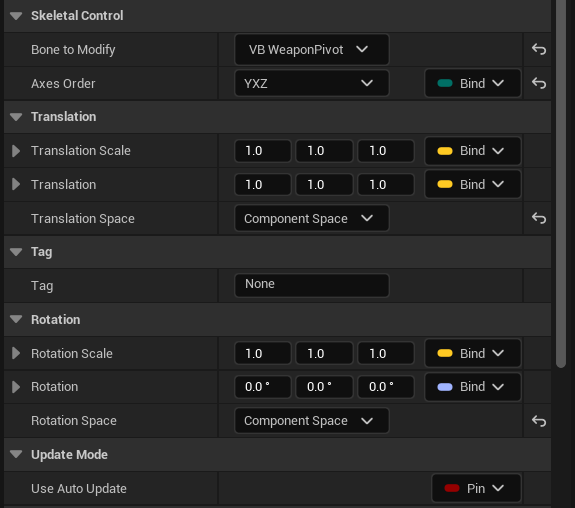
Node settings.
If you need help with IK
First, add Virtual Bones to the character head: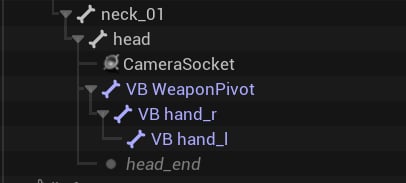
VB stands for Virtual Bone.
- VB WeaponPivot targets ik_hand_gun.
- VB hand_r targets hand_r.
- VB hand_l targets hand_l.
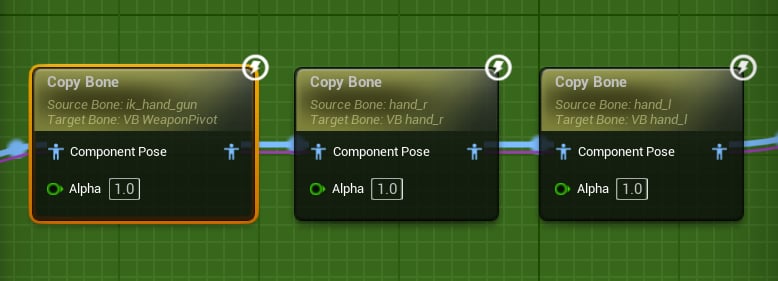
These will copy animation from FK bones to VBs.
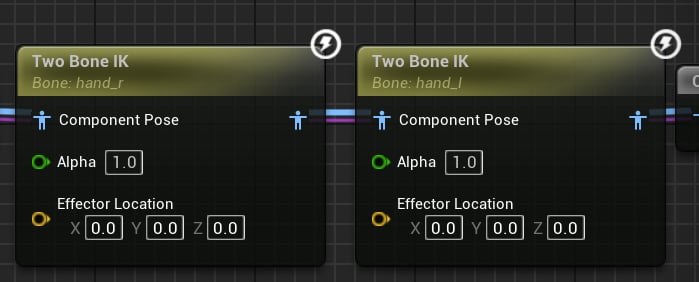
IK pass.
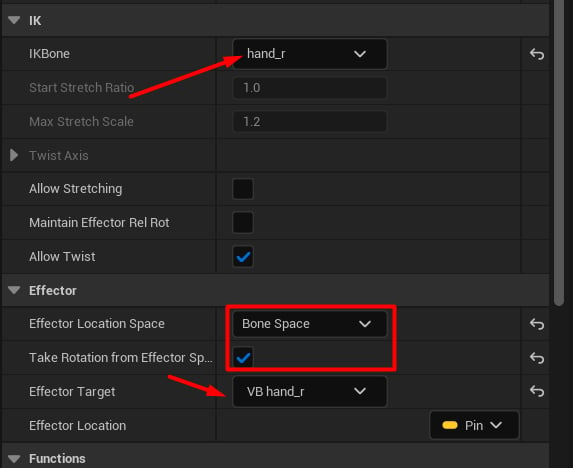
Preferred IK settings.
At this point, the setup is complete. If recoil is still not playing, double-check the steps above or:
- Check if Recoil Data has any values.
- The correct bone is animated by the RecoilAnimation.
- Play method is called every shot.
- The Fire Rate is in rounds-per-minute and greater than zero.