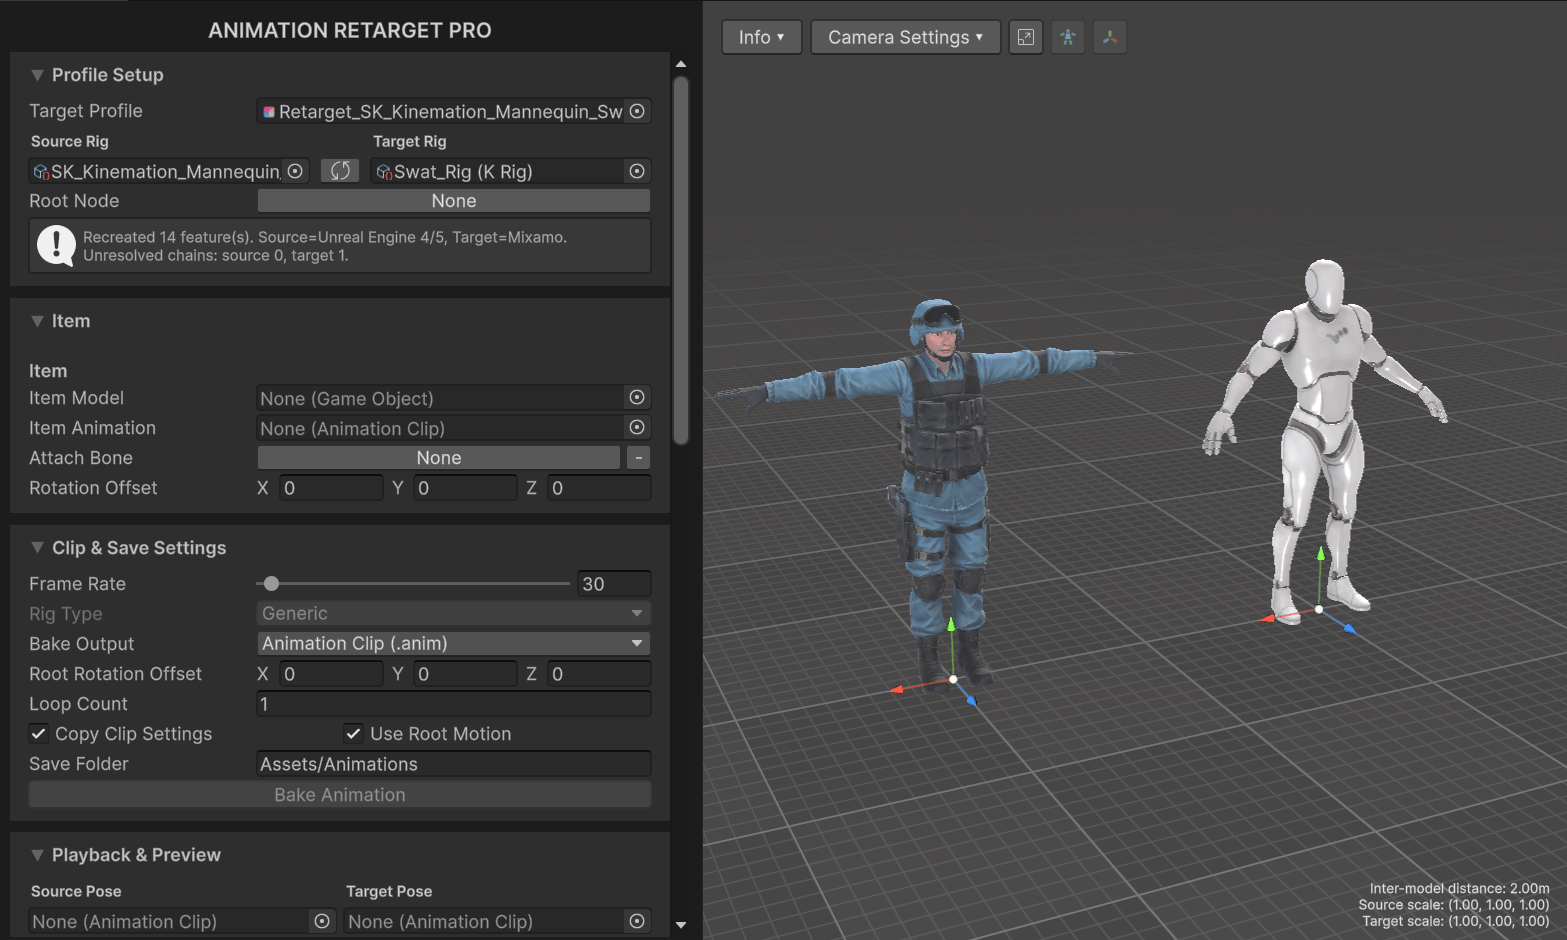
Create a Retarget Profile, map bone chains, add features, and configure humanoid characters.
Retarget Pro offers a very easy setup process.First, select the source character — this is the model to retarget animations FROM. Next, select the target model — this is the skeleton to retarget TO.Right-click and select “Create Retarget Profile”:
Create a new Retarget Profile.
Note:Retarget Profile is a data asset that contains retargeting settings for your character models. It will be saved to the current folder.
After that, a Retarget Pro Window will open up containing previews of selected characters and retargeting settings.
Tip: To find out more about this editor window, see Retarget Window.
Both characters should have similar poses as this directly impacts retargeting quality.Retarget Pro comes with T pose Animation Clips for popular skeletons:
Use these clips as source or target poses.
Assign “Source” and “Target” pose clips if character look different in the preview.
Scroll down to the Bone Chain Settings section. This list contains the features that transfer motion from the source chains to the target chains:Each feature must have a valid Source Chain and Target Chain. A None value or warning icon means that Retarget Pro could not find a matching chain automatically.
Retarget Pro supports Mixamo, Synty, Character Creator, UE/UE5, Humanoid, and Quadruped skeletons out of the box. Custom bone names, missing rig assets, and different chain structures can still require manual mapping.
Open Profile Setup and confirm that Source Rig and Target Rig reference the correct rigs. The source is the character you retarget animations from. The target is the character you retarget animations to.If the rigs are reversed, use the Swap button. This swaps the rigs and regenerates the bone chains.
2
Recreate the profile
If the rigs are correct but Bone Chain Settings is still empty, click Remap All Chains.
3
Click Add Retarget Feature in Bone Chain Settings.
If previous step didn’t generate bone chains, click Add Retarget Feature in Bone Chain Settings.
Click Add Retarget Feature to add a feature to the profile.
Select the feature that matches the chain:
Root Pelvis Feature for root and pelvis motion.
Basic Feature for general chains such as the spine, neck, and fingers/toes.
IK Feature for arms and legs.
Transform Feature for a position, rotation, or scale correction.
Copy Bone or Mirror Feature for specialized direct-copy or mirrored motion.
4
Map each missing chain
Select a feature with a None value or warning icon, then click Edit. Select the matching source and target bones in the mapping dialog, then save the mapping. Repeat this for every feature that is incomplete.
Click Edit to assign bones to the selected feature.
Select the source and target bones for the retarget chain.
Map the same body region on both sides. For example, map the source leftArm chain to the target leftArm chain. For Basic Feature, keep the source and target chain lengths matched when possible. Arm chains should end at the hand, and leg chains should end at the foot when they are used with IK Feature.
Use the following as a starting point for a humanoid source or target. Set Feature Weight to 1 for primary features. Set it to 0 only when you want to disable a feature without removing it.
IK Weight1. Keep Use Chain IK disabled for humanoids. Adjust Pole Weight, Joint Bone, Joint Offset, or Effector Offset only when a limb bends or lands incorrectly.
Specific correction (e.g., rotation or translation offset).
Add it after the main retargeting features. Use it only for a visible position, rotation, or scale mismatch.
For a typical humanoid, verify the root, pelvis, spine, neck, arm, leg, toe, and finger chains before previewing an animation. Start with the generated feature order, then make corrections only when the preview shows a problem.See Retarget Features for detailed feature settings.