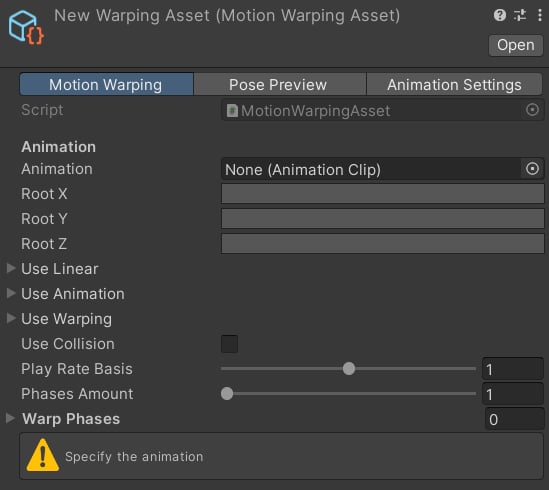
A Motion Warping Asset is a ScriptableObject that holds everything the runtime system needs to warp a specific animation — the extracted root motion curves, the warping phase windows, per-phase offsets and rate limits, and global flags for interpolation and collision. You create one asset per animation (or per interaction type) and reference it from your Warp Provider at runtime.

Creating a Motion Warping Asset

1

Create the asset

In the Project window, right-click and choose Create → MotionWarping → MotionWarpingAsset. A new asset appears in the selected folder.
2

Assign the animation clip

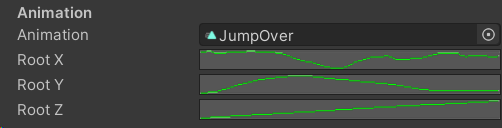
Select the asset. In the Inspector, assign the animation clip you want to warp to the Clip field. Use a clip that has baked root motion — for example, a JumpOver or Mantle animation.
3

Extract root motion curves

Click the Extract Curves button. The system reads the clip’s root bone keyframes and generates X, Y, and Z translation curves in the asset editor.
If your animation does not have root motion keyframes, you can paint the curves manually in the asset editor after extraction.
4

Set the phase count

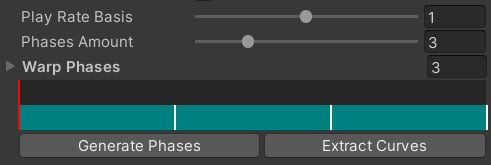
Set Phases Amount to the number of target points your interaction requires:
  • Climbing / Mantle1 (one ledge-top point)
  • Vault / JumpOver3 (close edge, far edge, landing)
Click Generate Phases. The system places equally-spaced purple warp phase windows across the timeline.
5

Adjust the phase windows

Hover over a green phase bar to reveal drag handles. Drag the bar to reposition it, or drag an edge to resize it so the window covers the correct portion of the animation.
6

Configure phase properties

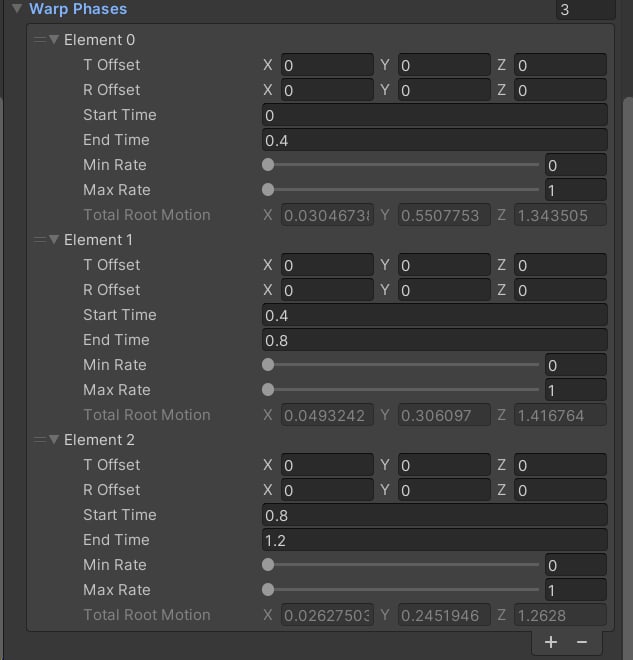
Expand the Warp Phases list and configure each phase (see Warp Phase Properties below).
7

Refresh Total Root Motion

Close the asset and re-open it. This triggers a recalculation of the Total Root Motion values based on the current curve data and phase boundaries.

Warp Phase Properties

Each entry in the Warp Phases list corresponds to one purple window on the timeline.
Vector3
A translation offset added to the target point for this phase. Use it to nudge the final arrival position — for example, to pull the character slightly back from the ledge edge, or to compensate for a pose that looks off at a particular obstacle size.
Quaternion / Euler
A rotation offset added to the target rotation for this phase. Useful for correcting the character’s facing direction at the warp target without modifying the original animation.
float
The animation time (in seconds or normalised units, depending on the editor view) at which this warp phase begins. Editing the phase window handles updates this value automatically.
float
The animation time at which this warp phase ends. The character must reach the target point by this time.
float
The minimum play rate multiplier allowed for this phase. Prevents the animation from slowing down so much that it looks unnatural when the real obstacle is much farther than the baked animation assumed.
float
The maximum play rate multiplier allowed for this phase. Prevents the animation from speeding up so much that it looks rushed when the real obstacle is much closer.
Vector3
The accumulated root motion for each axis across this phase — effectively the distance the root bone travels from Start Time to End Time. This value is read-only and is refreshed automatically when you re-open the asset.
If you edit the animation curves after generating phases, close and re-open the asset to update these values.

Additional Properties

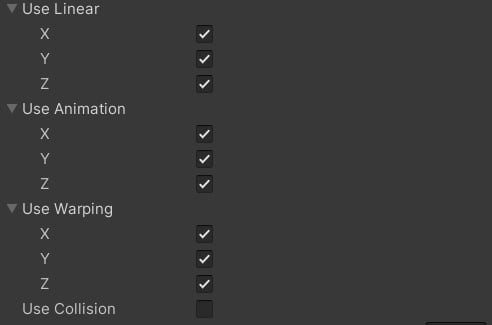
Below the phase list, the Additional Properties section provides global flags that control how warping is applied across all phases.
bool (per axis)
When enabled on an axis, the system uses linear interpolation to compute the warp offset for that axis instead of curve-based interpolation. This produces a constant-speed approach to the target and can look better for purely translational interactions like horizontal vaulting.
bool (per axis)
When enabled, the system plays the original animation on top of the warping offset for the selected axis. Disable this only when you want warping to completely override the animation on that axis, with no contribution from the baked root motion.
bool (per axis)
Master toggle for warping on each axis. When disabled, the system leaves that axis untouched and the original root motion plays as-is. Use this to warp vertical movement only, for example, while leaving horizontal root motion unchanged.
bool
When enabled, the system respects the character’s native collision component — either a CharacterController or a Rigidbody — while applying the warp offset. This means the character reacts to the environment during warping rather than clipping through geometry.Enable this for warped melee attacks or any interaction where the character should still be blocked by walls. Disable it for climbing and vaulting where unobstructed movement through the warp path is required.

Next Steps

With a Motion Warping Asset configured, add the MotionWarping component to your character and reference this asset from a Warp Provider to trigger it at runtime.