Adding the Component
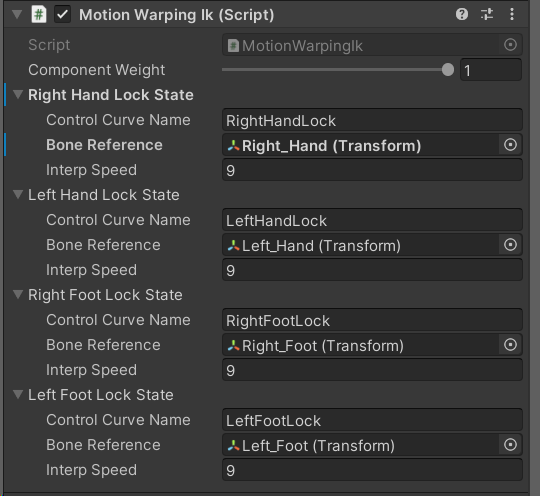
Add the MotionWarpingIk component to the same GameObject that holds yourMotionWarping component and Animator. The component reads curve values from the Animator each frame to know when to lock or unlock each limb.
Component Weight
float
default:"1.0"
A global multiplier for all IK outputs produced by this component. Set it to
0 to completely disable IK locking without removing the component. Values between 0 and 1 blend the locked IK position with the animated position.Lock States
The component contains four Lock States — one per limb: left hand, right hand, left foot, and right foot. Configure each one independently to match what the animation requires.string
The name of the float parameter in the Animator Controller that drives the IK weight for this limb. When the parameter value is
1, the limb is fully locked. When it is 0, IK locking is off and the bone follows the animation normally.You add this parameter to the Animator Controller yourself (see Setting Up Animator Parameters below). You can choose any name — just make sure the string here matches exactly.Transform
The tip bone to lock — typically the hand or foot bone. The system captures the world-space position and rotation of this bone at the moment the control curve value rises above zero, and then holds it there until the curve drops back to zero.
float
The smoothing speed for blending IK in and out. A higher value snaps the IK on and off quickly (suitable for hard surface contacts like a hand gripping a ledge). A lower value produces a gradual blend, which can look more natural for softer contacts.
Setting Up Animator Parameters
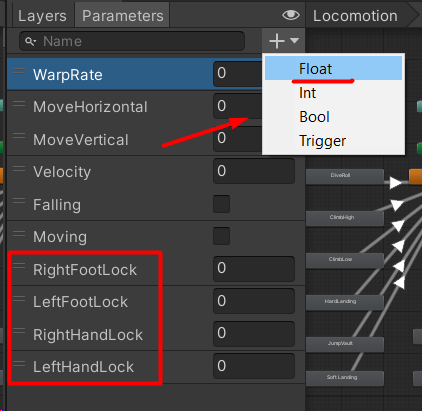
For each limb you want to lock, add a matching float parameter to your Animator Controller. The parameter names shown in the Inspector example below are suggestions — use names that make sense for your project, then enter the same names in the Control Curve Name fields. Example parameter names:IK_LeftHandIK_RightHandIK_LeftFootIK_RightFoot
You only need to add parameters for the limbs you actually use. If a vaulting animation only locks the left foot, you can leave the other Lock States unconfigured.
Adding Control Curves to Animations
The Animator parameter drives the IK weight, but the value of that parameter is set by an animation curve baked into the clip itself. This lets you author exactly when each limb locks and unlocks, frame by frame, alongside the rest of the animation.1
Open the Animation window
Select the animation clip and open the Animation window (Window → Animation → Animation).
2
Add a curve for the limb
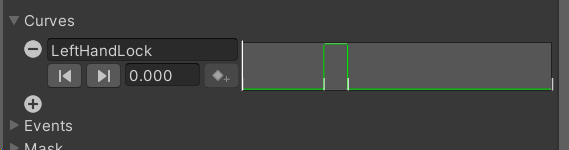
Click Add Property, expand the MotionWarpingIk component (or use Add Curve if the parameter is already listed), and add a float curve matching the Control Curve Name — for example,
IK_LeftFoot.3
Key the curve at 0 and 1
Place a keyframe at
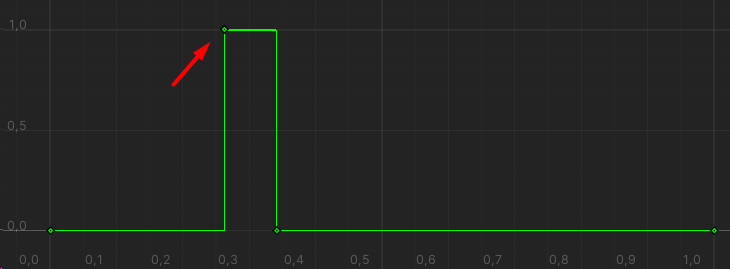
0 at the start of the clip and a keyframe at 1 at the moment the foot contacts the surface. Place another keyframe at 0 at the moment the foot lifts off again.4
Set constant interpolation
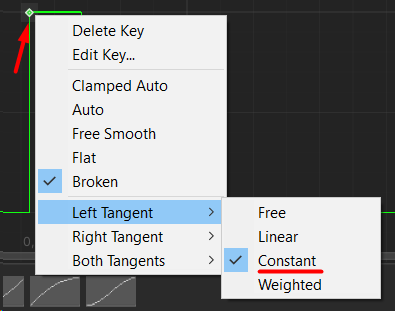
IK locking should switch on and off instantly — not ease in or out. Right-click each keyframe and select Both Tangents → Constant (or choose the flat constant option from the tangent menu). This ensures the curve snaps between 0 and 1 without any gradual ramp.
Example: Vaulting Animation
In a vaulting animation, you might want to lock the left foot when it plants on the obstacle surface and release it just before the character pushes off to land. The curve would look like this:- 0.0 s — value
0(foot is in the air, no IK locking) - 0.4 s — value
1(foot contacts the surface, IK locks) - 0.7 s — value
0(foot lifts off, IK releases)