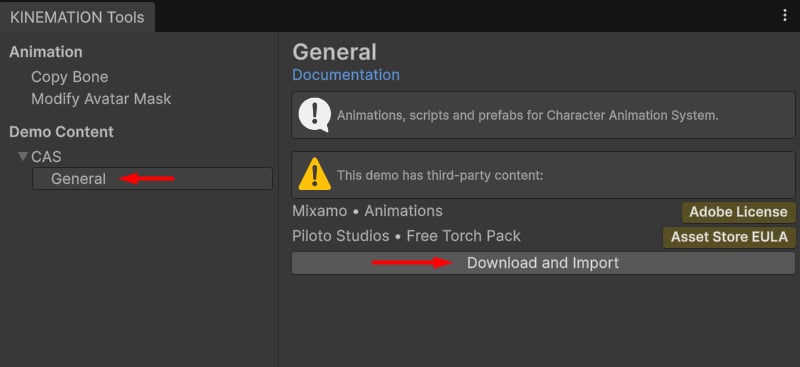
Before setting up your own character, it is highly recommended to install the CAS demo content. The demo gives you a ready-made character, animations, Animator Controllers, and a complete player prefab to learn from — and the quickstart guide uses these assets throughout.

Install the Demo Content

1

Open the KINEMATION hub

In the Unity menu bar, go to Tools → KINEMATION. This opens the Kinemation content hub window.
2

Select CAS Demo

In the hub, find and select CAS Demo from the list of available content packages.
3

Download and import

Click Download and Import. Unity downloads the package in the background. When the download finishes, Unity displays the standard import dialog.Click Import All to bring in everything at once, or deselect individual items if you want to import only specific assets.
If you already have some CAS demo assets in your project from a previous version, Unity will highlight conflicting files in the import dialog. Review them before clicking Import to avoid overwriting customised assets.

Install a Demo Scene

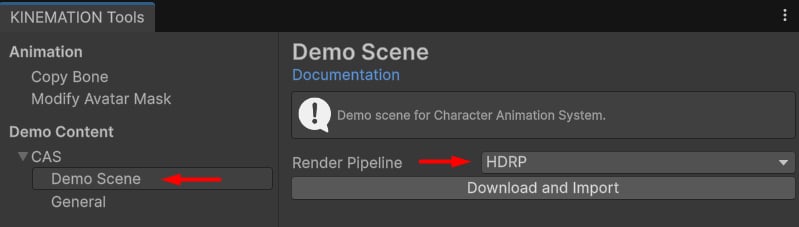
The demo content also includes pre-configured scenes that demonstrate the full CAS feature set in context — locomotion blending, procedural foot IK, weapon overlays, and Motion Warping climbing. Separate scene packages are provided for URP and HDRP.
1

Open the KINEMATION hub again

Go to Tools → KINEMATION if the hub is not already open.
2

Select Demo Scene

Choose Demo Scene in the hub.
3

Pick your render pipeline

Select either URP or HDRP to match your project’s render pipeline.
4

Download

Click Download. The scene and its supporting assets import into your project automatically.
Demo scenes are available for URP and HDRP only. The Built-in Render Pipeline is not supported for the demo scene, though CAS itself works with any render pipeline.
Once the scene is imported, open it from the Project window and press Play to see a fully configured CAS character in action. Use this as a reference while following the rest of the quickstart guide.